Email Validation Integration for HubSpot Forms
Email Validationⓘ Integration for HubSpot Forms
The ZeroBounce HubSpot integration allows you to seamlessly import your HubSpot email lists for email validationⓘ, real-time validationⓘ, and Email Scoringⓘ.
Prerequisites
You must have an active HubSpot account, a website to integrate HubSpot forms and an active ZeroBounce account.
If you do not have access to the mentioned accounts, you can create them using the following links:
How to set up the HubSpot Forms integration
Once you have access to HubSpot and ZeroBounce, proceed with the following steps:
Step 1:
Go to https://www.zerobounce.net/members/signin and sign in with your ZeroBounce account. Then, go to the left menu and click Integrations.
Step 2:
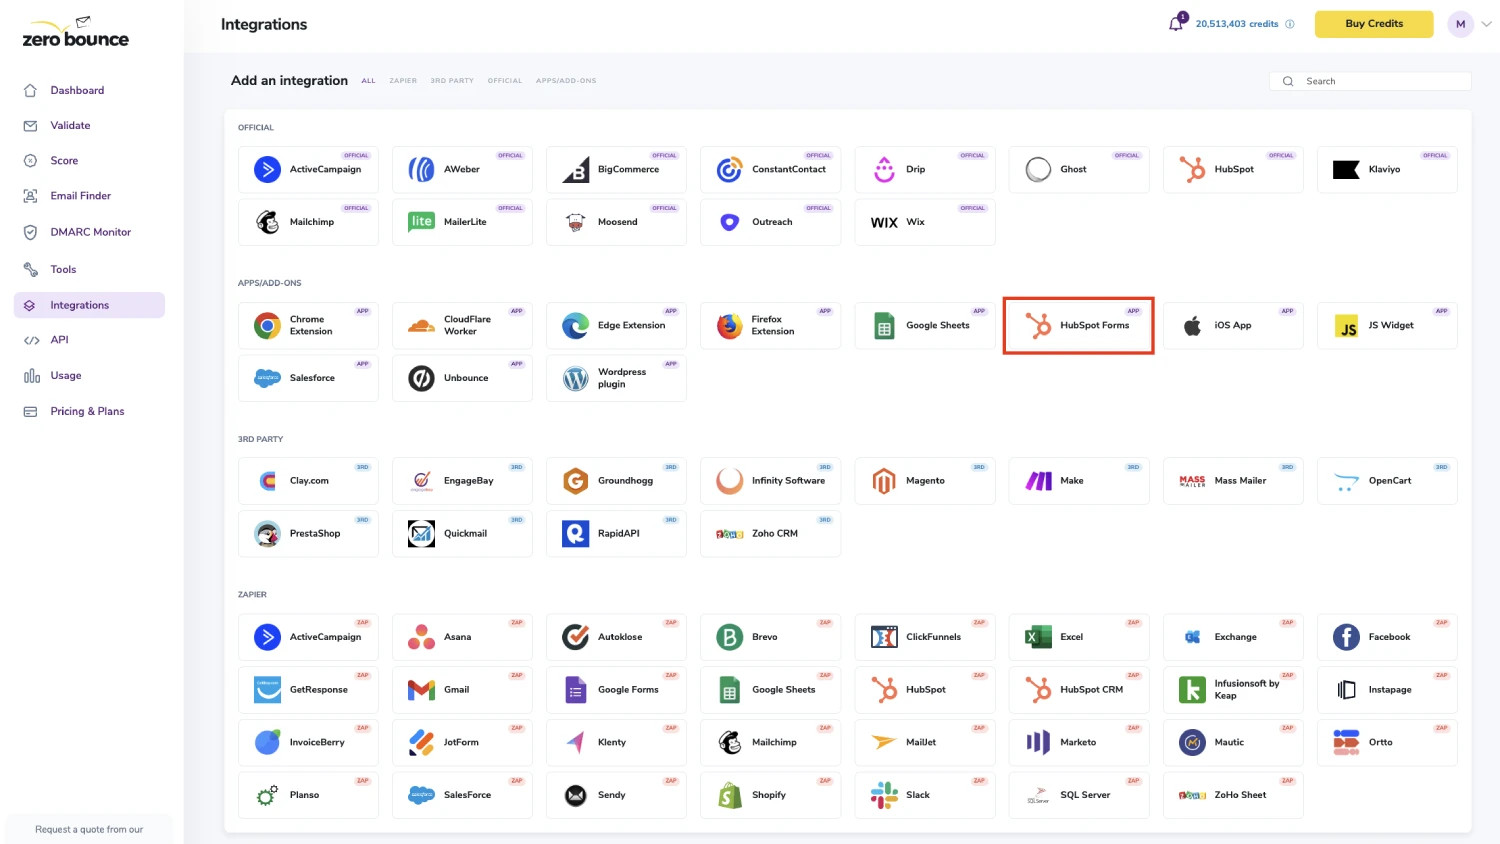
On the Integrations page, select HubSpot from the Apps/Add-ons panel.
Step 3:
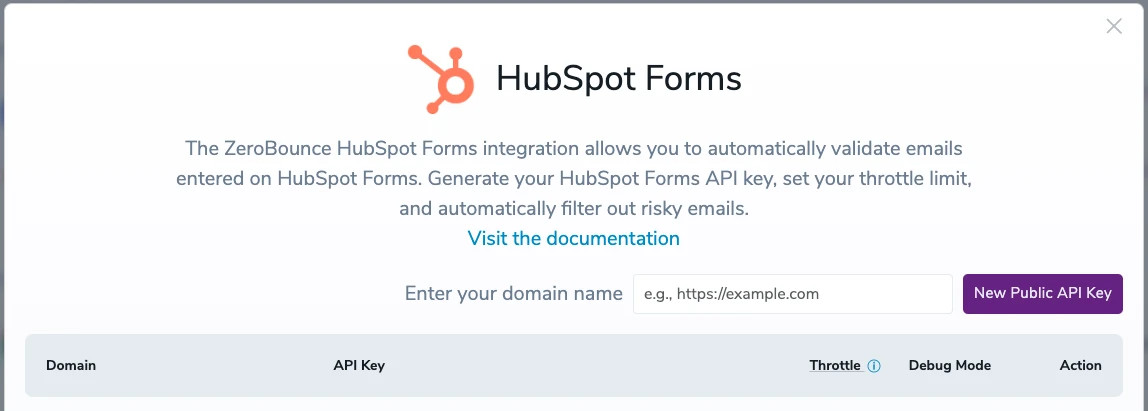
Enter your website URL and click 'New Public API Key' to generate an API key linked to your site.
Use only the domain to generate the API Key. Ex: https://my.website.com. Make sure that the URL starts with https:// and there is no / at the end. Failure to do so will result in validation issues.
Step 4:
In this section, you can manage your API Keys in the following ways:
- URL - if the URL is changed, ensure that the script is placed on the correct page
- Throttle - the number of email validation attempts per hour on your form
- Change statuses
- Select the checkboxes that represent the validation criteria you want to designate as "valid" for your use case. Unselected checkboxes indicate that the associated criteria will not be considered valid.
- Generate a new API Key
- Show/Hide API Key
- Copy API Key
- Debug Mode
- Delete
After generating your API key in the previous step, copy it and proceed to your webpage to continue configuring your integration (Step 5).
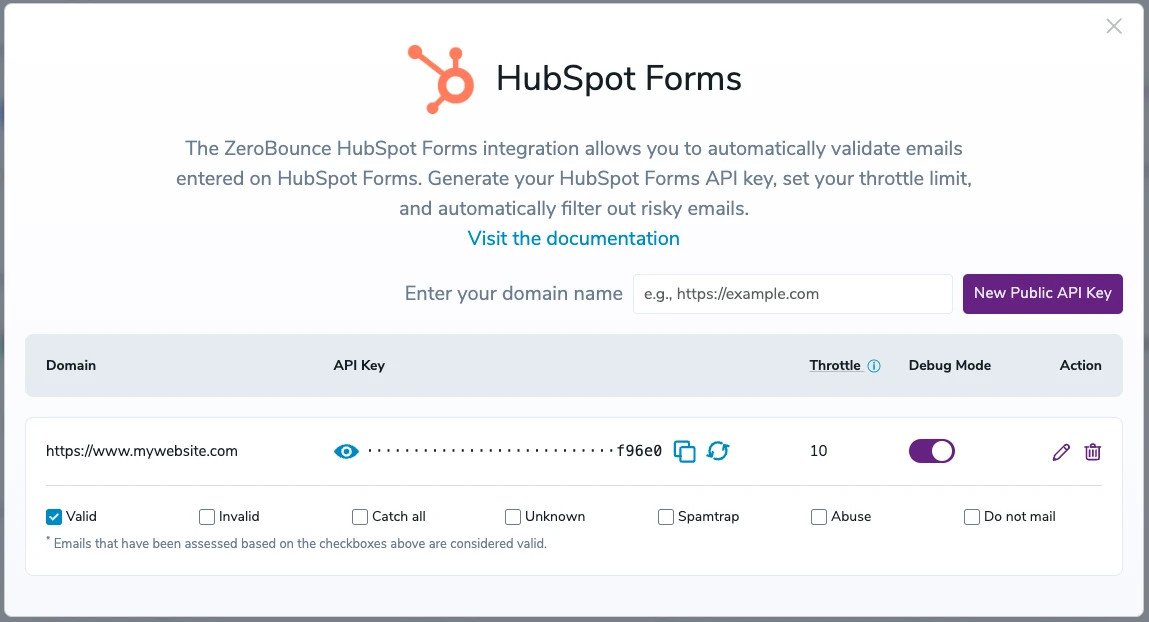
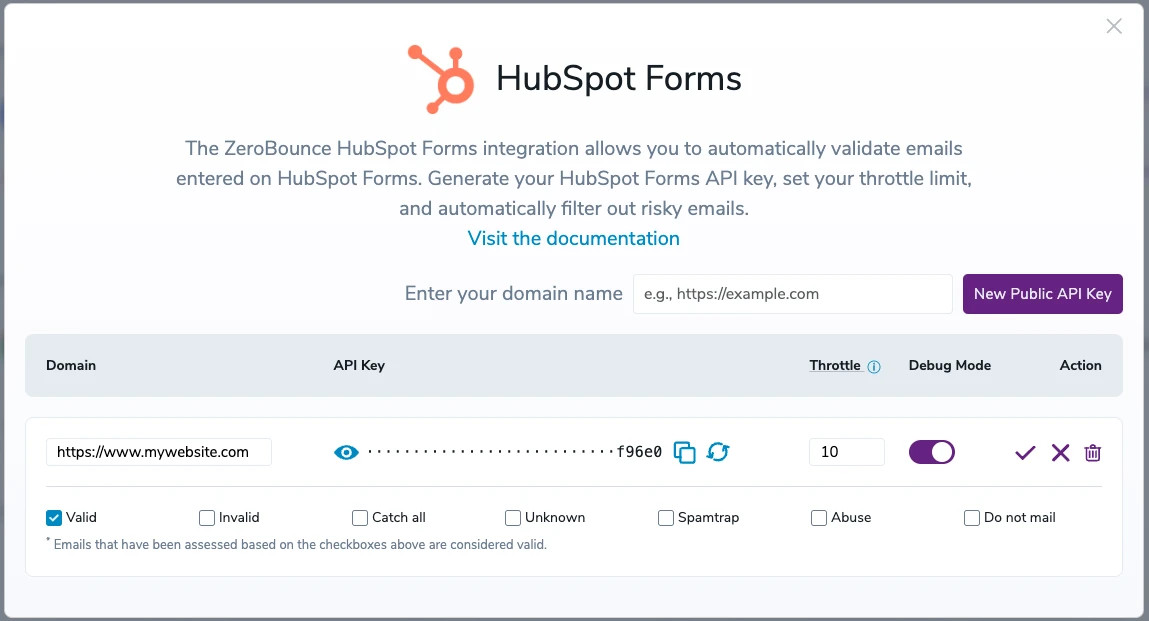
Debug mode removes validation limits, but to safeguard your validation services, it's best not to keep it active for too long.
Step 5:
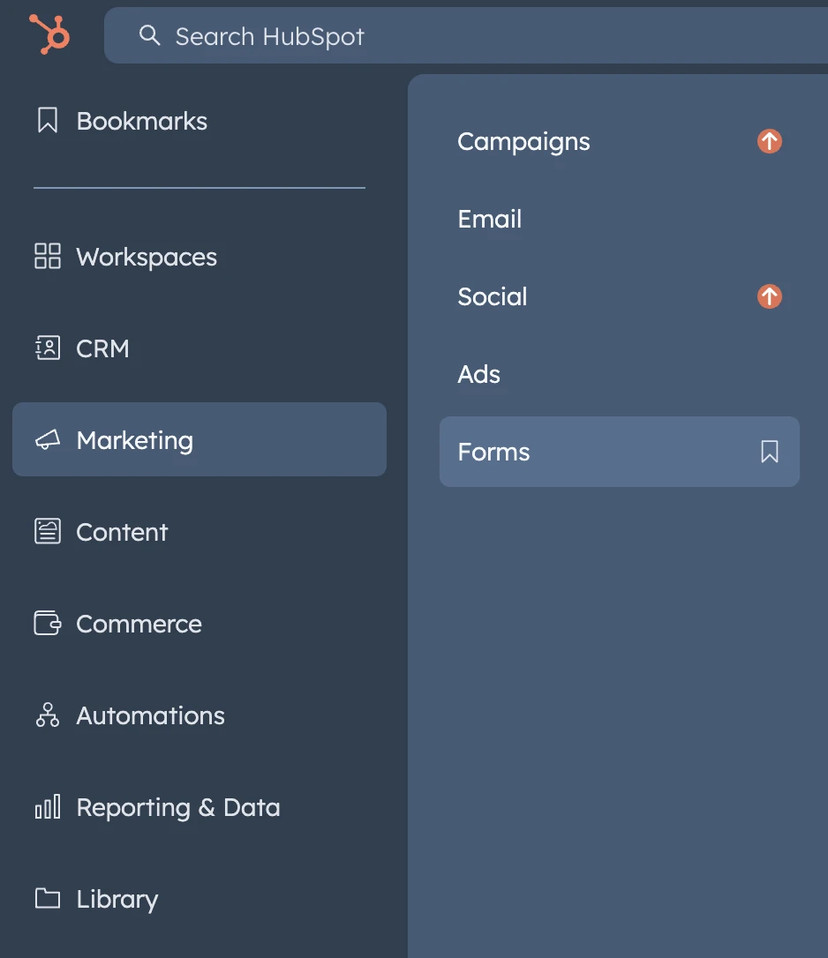
Visit the HubSpot website and, using the left navigation, navigate to the Forms section.
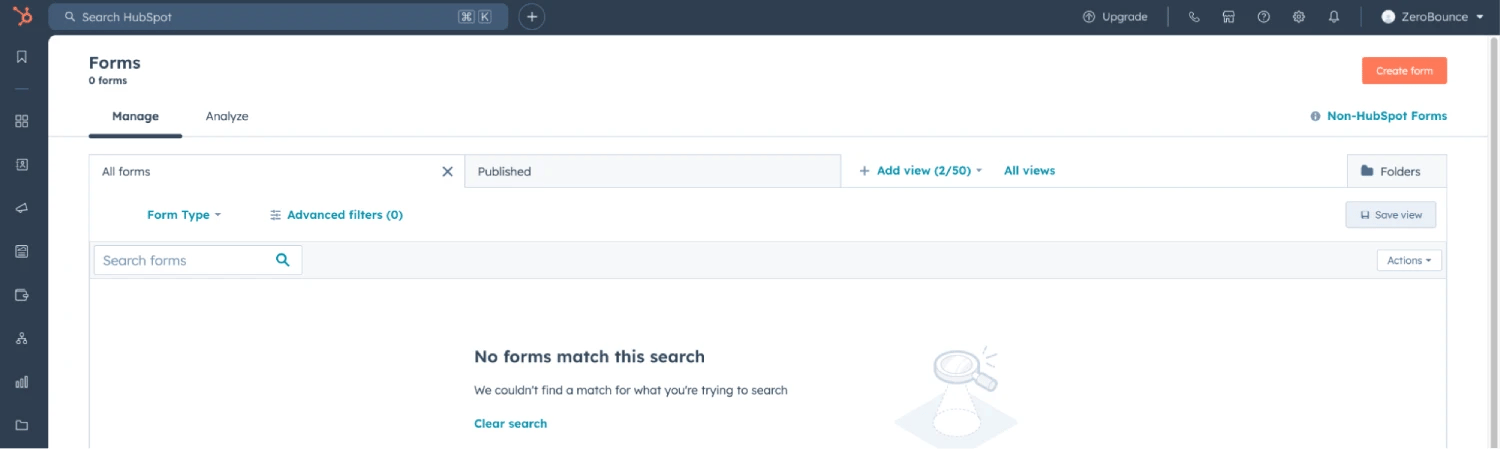
Once on the Forms page, create a new form using the top right button Create Form and follow the instructions for Legacy Form Editor.
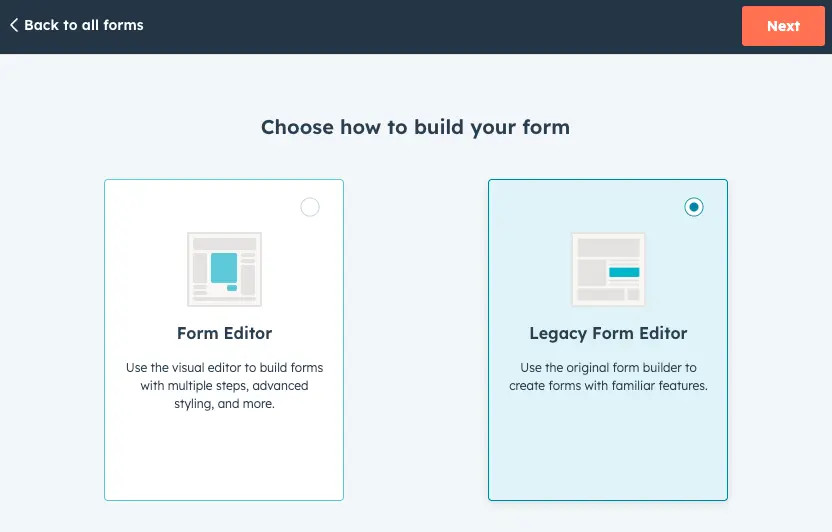
Compatibility Note:
HubSpot forms are exclusively supported by the Legacy Form Builder. This feature is not compatible with the new Form Editor. Please ensure you are using the legacy version to proceed.
Select the appropriate form template for your needs and finalize the process by clicking the Start button.
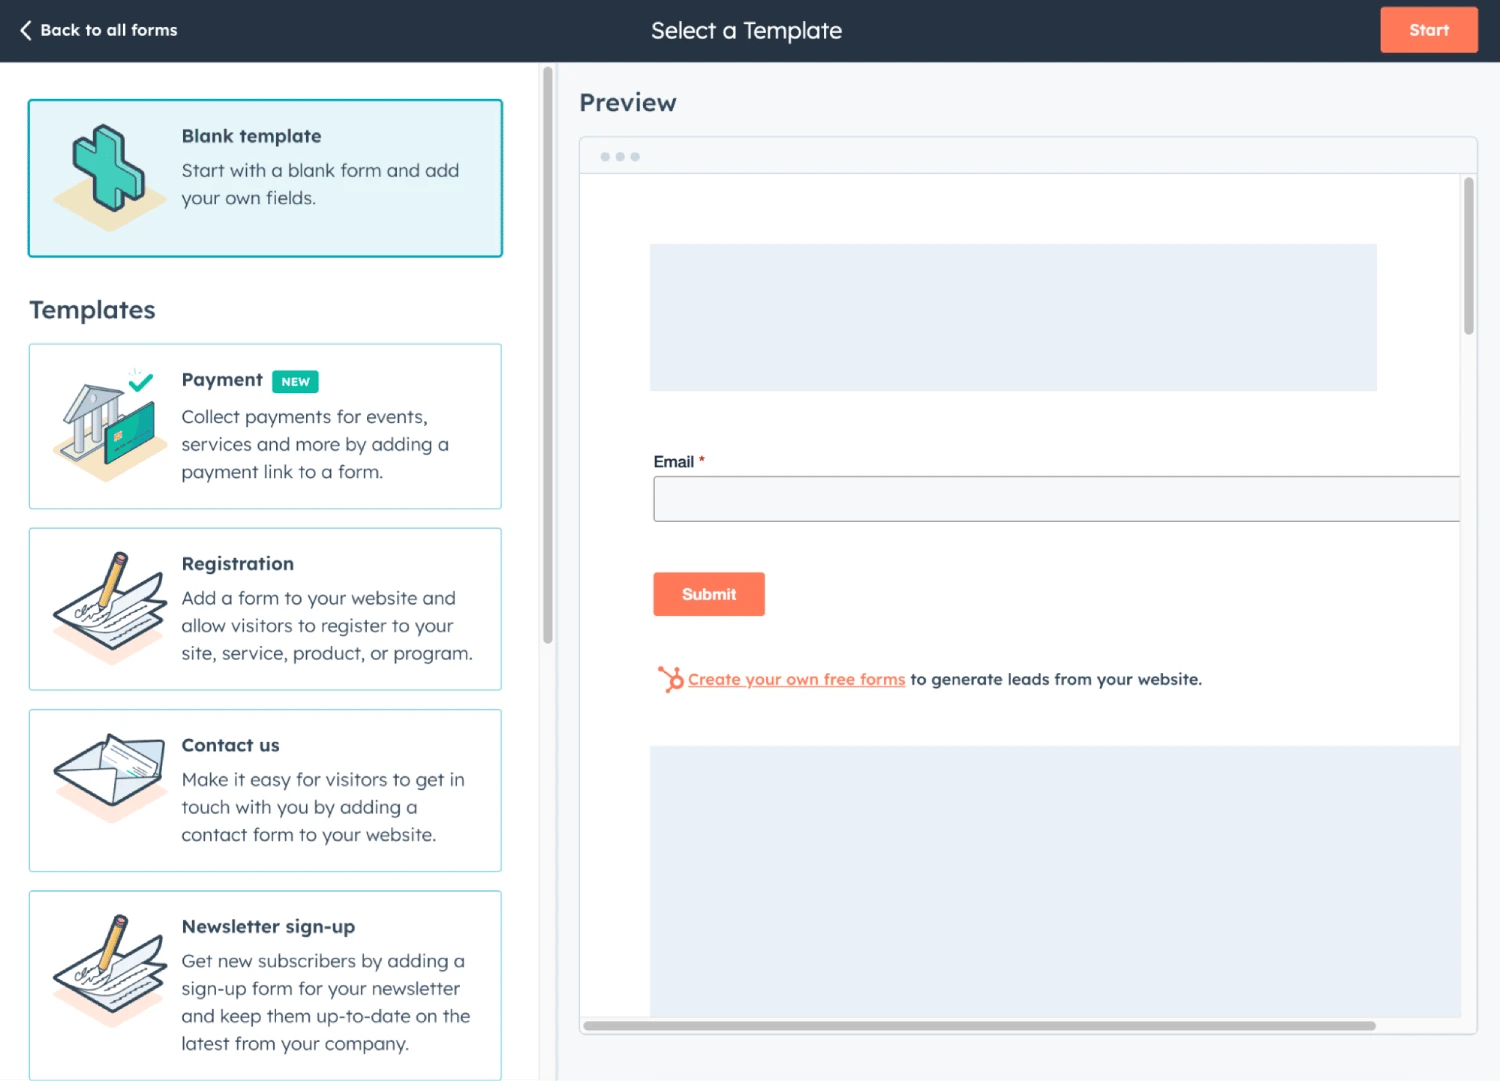
Once the form is set up, click the Embed button in the top right corner, select the Embed code tab, and click on Copy.
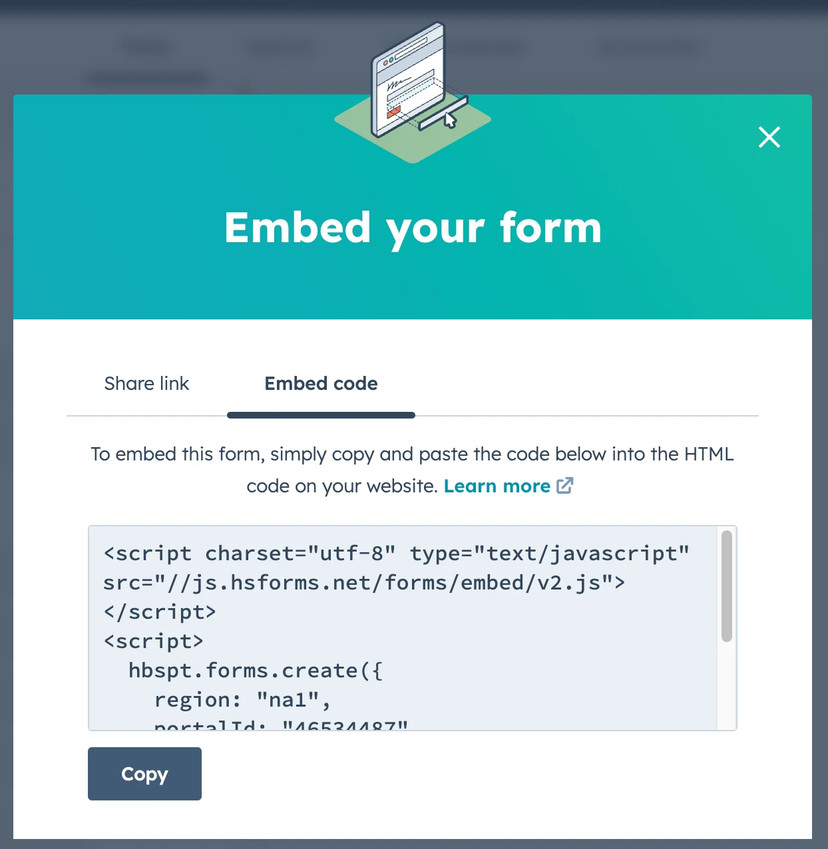
Step 6:
With the Embed code from HubSpot, proceed to your website and place the code in the appropriate location. This location is where your form will appear.

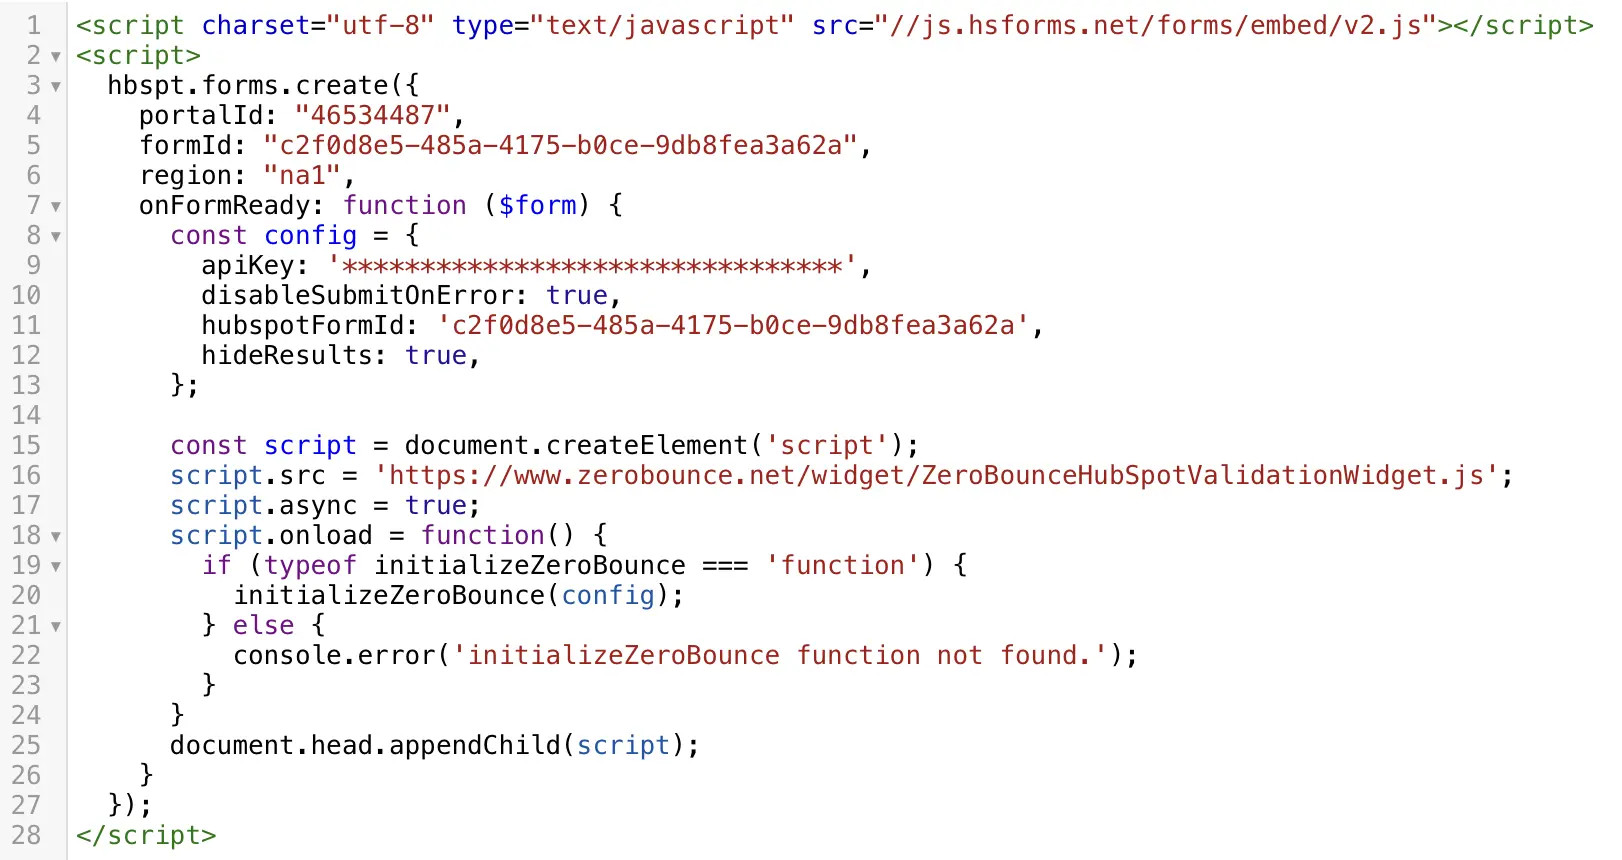
Step 7:
Add the ZeroBounce code for the validation widget as the fourth parameter for the create function (Step 6).
apiKey - Use the API key generated in Step 4.
hubspotFormId - This is form ID that can be found on each embedded form under the “formId” property.
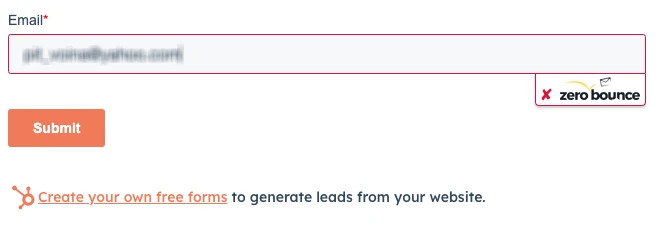
hideResults - When set to true, the widget hides the validation result (the checkmark/X icon and border styling) from the user. Only the loading indicator appears during validation, then it disappears. Validation still runs in the background and form submission remains controlled by disableSubmitOnError. The widget injects a hidden input named zb_validation_result with values valid, invalid, or error — use this to provide custom feedback to the user (e.g., custom messages, styling, or redirects). Defaults to false.
The final code should resemble the image below.
Step 8:
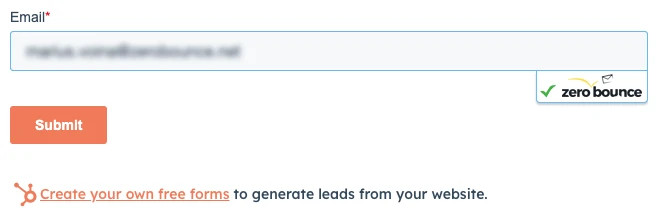
Once everything is in place, save the page, publish it, and your HubSpot Form with ZeroBounce email validationⓘ will be ready.
Please note:
Certain cases will allow the form to be submitted even if the email is invalid.
These cases are the following:
- If the ZeroBounce user account used to generate the API key runs out of credits.
- If the throttle limit is exceeded. Throttle is set by default to 10 per hour and can be changed in the HubSpot integration screen (see Step 4).
Emails that are considered valid include those categorized as catch-all, unknown, and valid.