Validation Process

YOU CAN VALIDATE YOUR EMAIL(S) VIA THE BROWSER UPLOADING FILES OR VIA THE API.
- Step 1: Register your new account with ZeroBounce.
- Step 2: Verify your email by clicking the link in the email we send you.
- Step 3: Sign in to your ZeroBounce account.
- Step 4: Access our Email Validation page
- Step 5: Try out our service for free by uploading a .CSV, .XLS, XLSX or .TXT file with up to 100 contacts.
- Step 6: Review your results and decide how many emails you need to validate.
- Step 7: Buy more credits here.
- Step 8: Upload your .CSV, .XLS, .XLSX or .TXT with the emails you would like to verify.
NOTE: Give the system approximately 45-60 minutes per 100,000 contacts. - Step 9: Download your new clean list by clicking on the purple arrow button on the right-side of the respective file.
NOTE: The download button will be missing or grayed-out if the file has not finished processing. 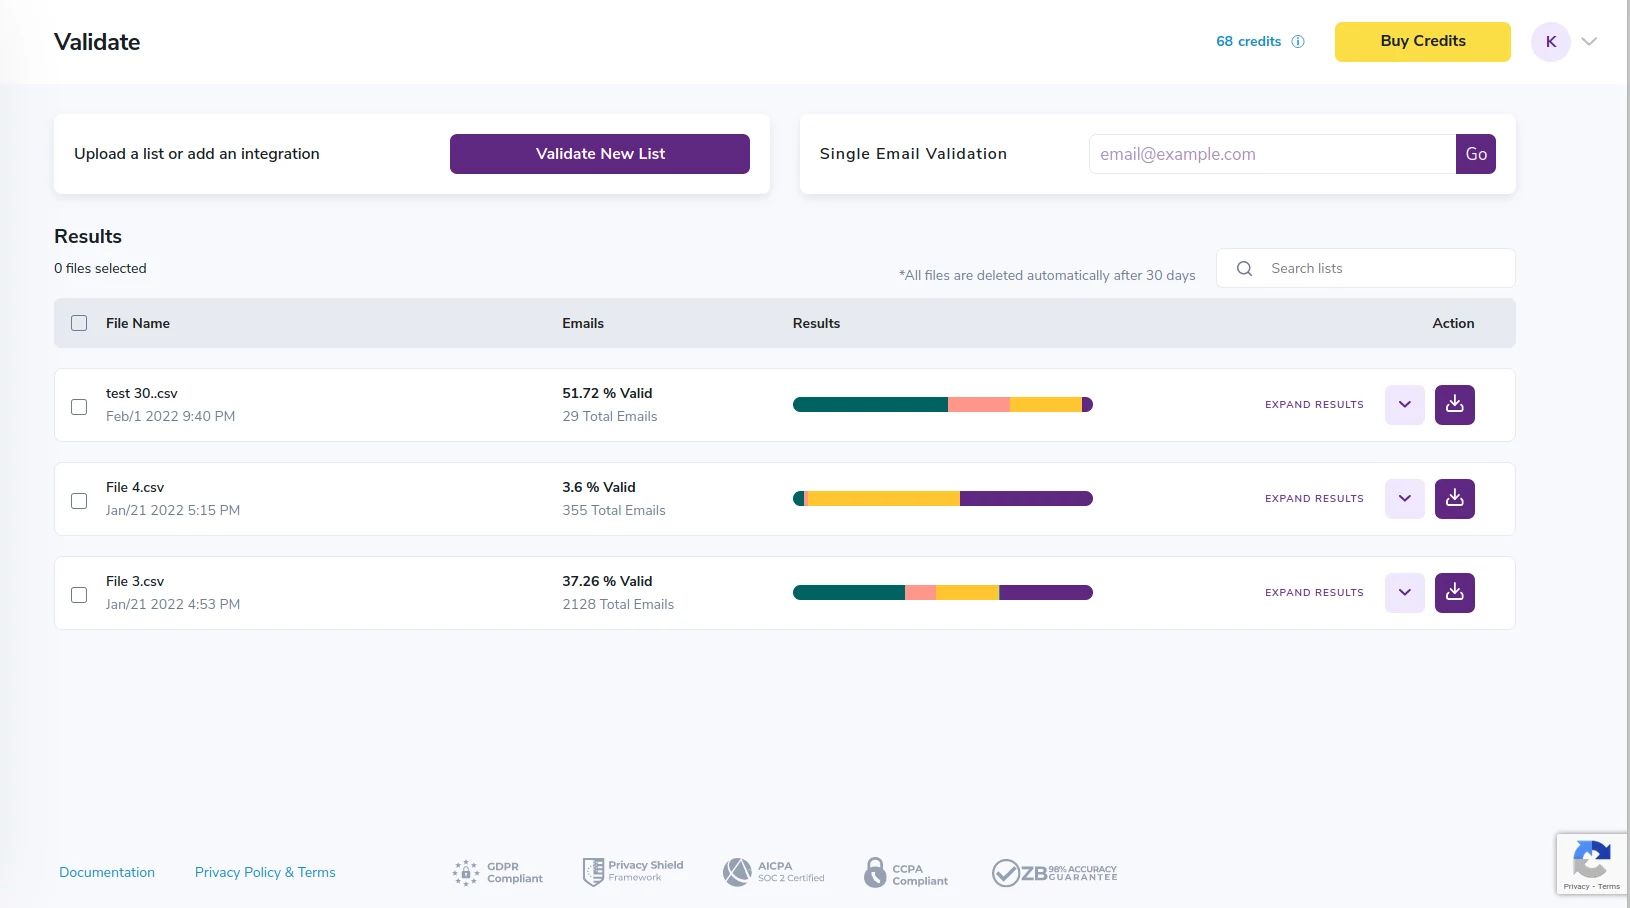
Results download page
- Step 10: Select the columns you want appended on the results. Then click “Download”
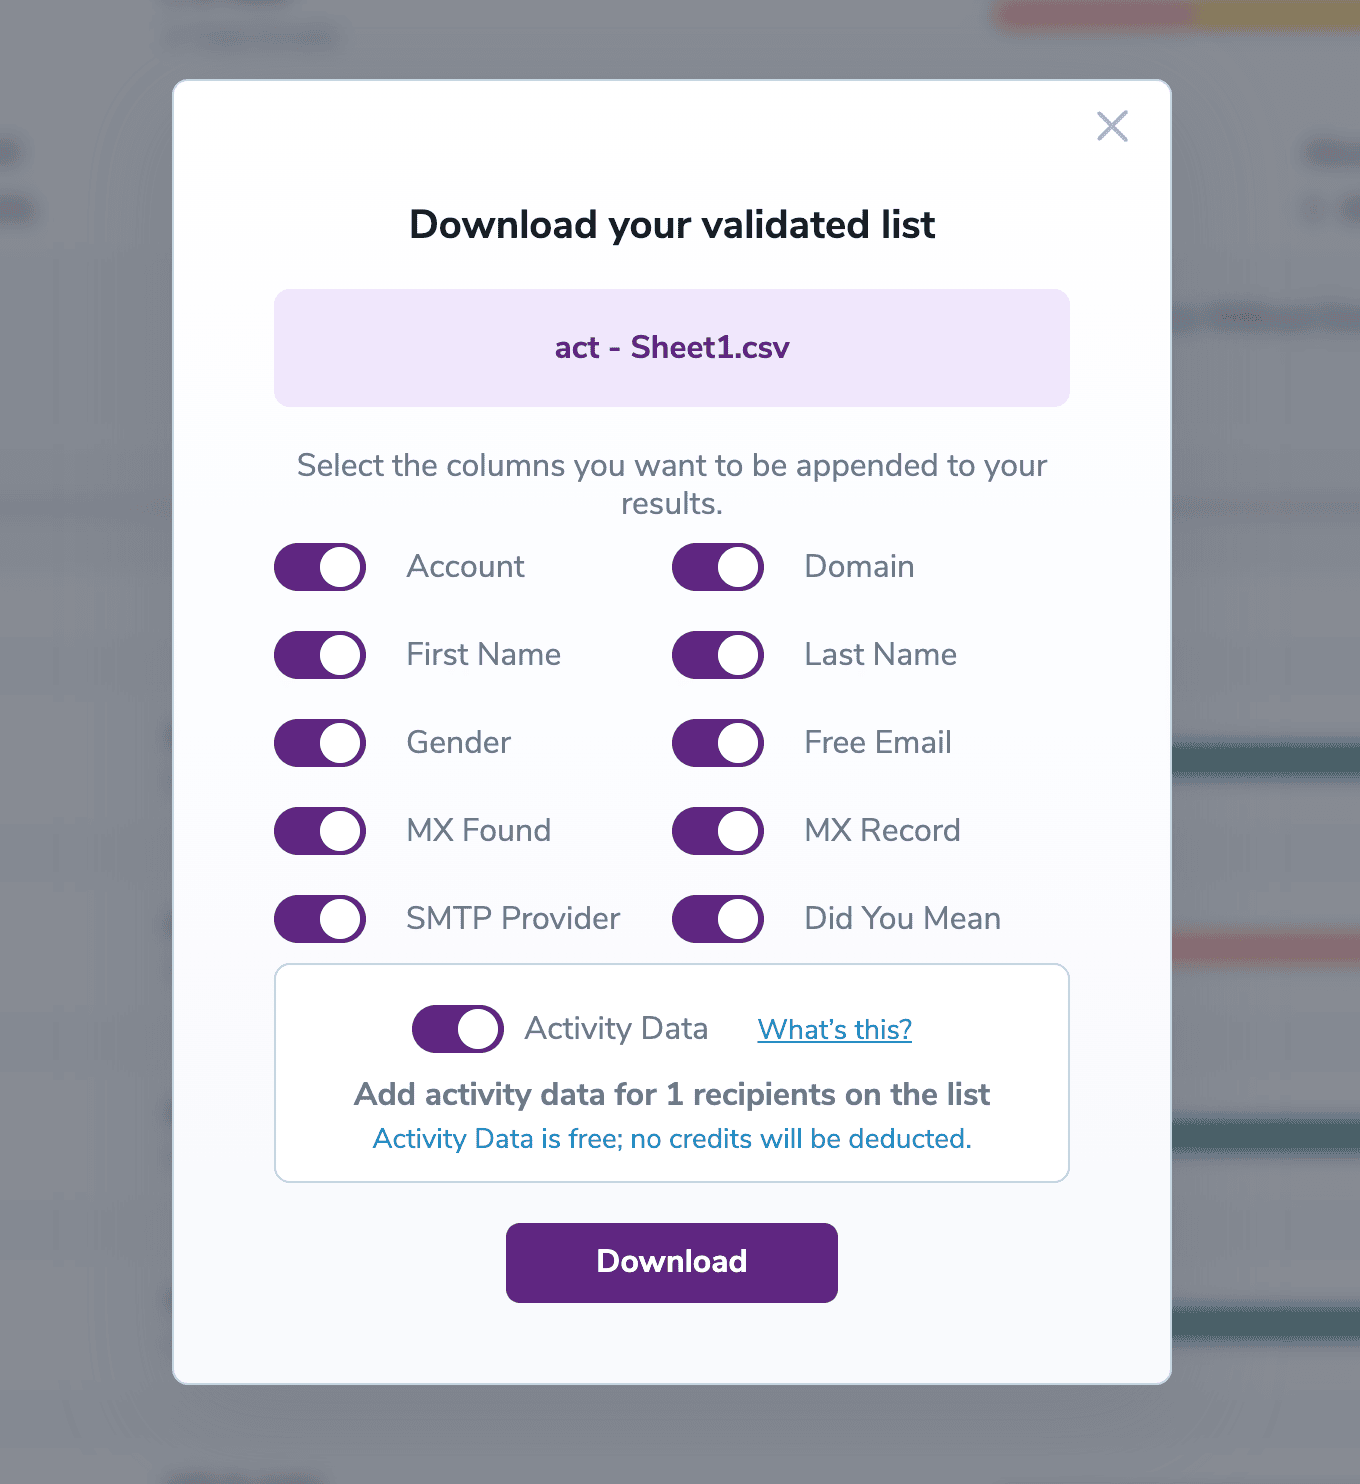
Select the data you need to download
- Step 11: Once you download your file, you will receive an email with the unique key to unlock the encrypted .ZIP file.
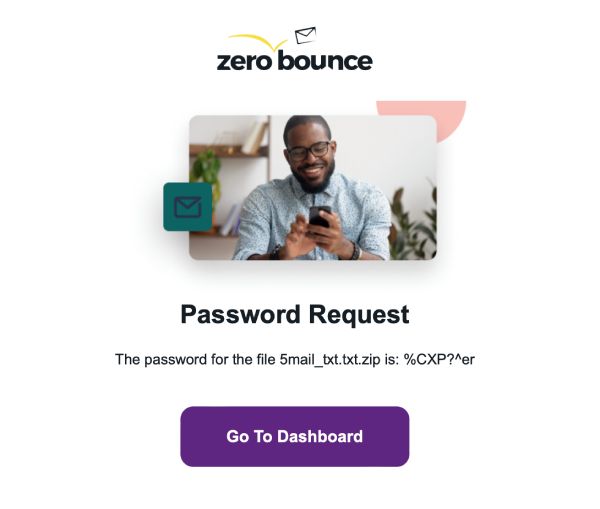
Your downloaded file will be encrypted. After your download completes you will receive an email with the encryption key
- Step 12: When you open the .zip file below, you will be prompted to enter the unique key above.
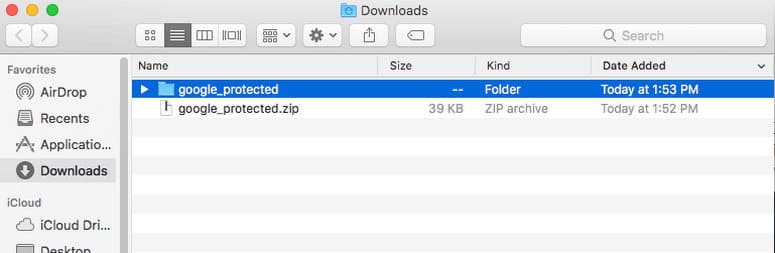
Find your downloaded file and open it. You will be prompted to enter the key provided to you by email
- Step 13: Once you enter the key, you will have access to the files with your validated email results.
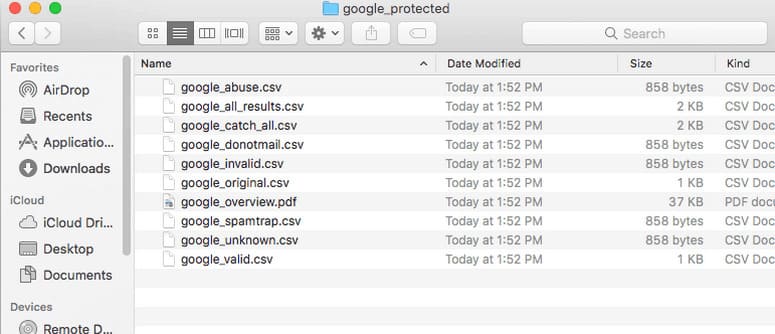
The files will be accessible once you enter the key