DELIVERABILITY TOOLS
ZeroBounce Deliverability Tools help our customers diagnose and remediate email deliverability issues. These new tools include an Inbox Placement Tester, Email Server Tester, Blacklist Monitoring service, DMARC monitor and a newly-launched email Warmup service. These work in conjunction with our core business service, email list validation.
Inbox Placement Tester

The Inbox Placement Tester checks if your emails/newsletters will make it to your recipient’s inbox. This test will allow you to send an email to different mailbox providers around the world and quickly check to see the folder placement of that email (Inbox, Spam, Promotions).
The Inbox Placement Tester uses over 20 different global mailbox providers. This test can diagnose deliverability errors and grant insight into how different mailbox providers handle your email campaigns.
Important Note: If you send out a single email with multiple recipients and CC's, it may be flagged as spam. Please send out multiple emails when testing with fewer To/CC's for better results.
How to use the Inbox Placement Tester
I. Sender email
1. Click the ‘Create New Test’ button.

2. Enter a unique test name.
Select the test type - Sender email
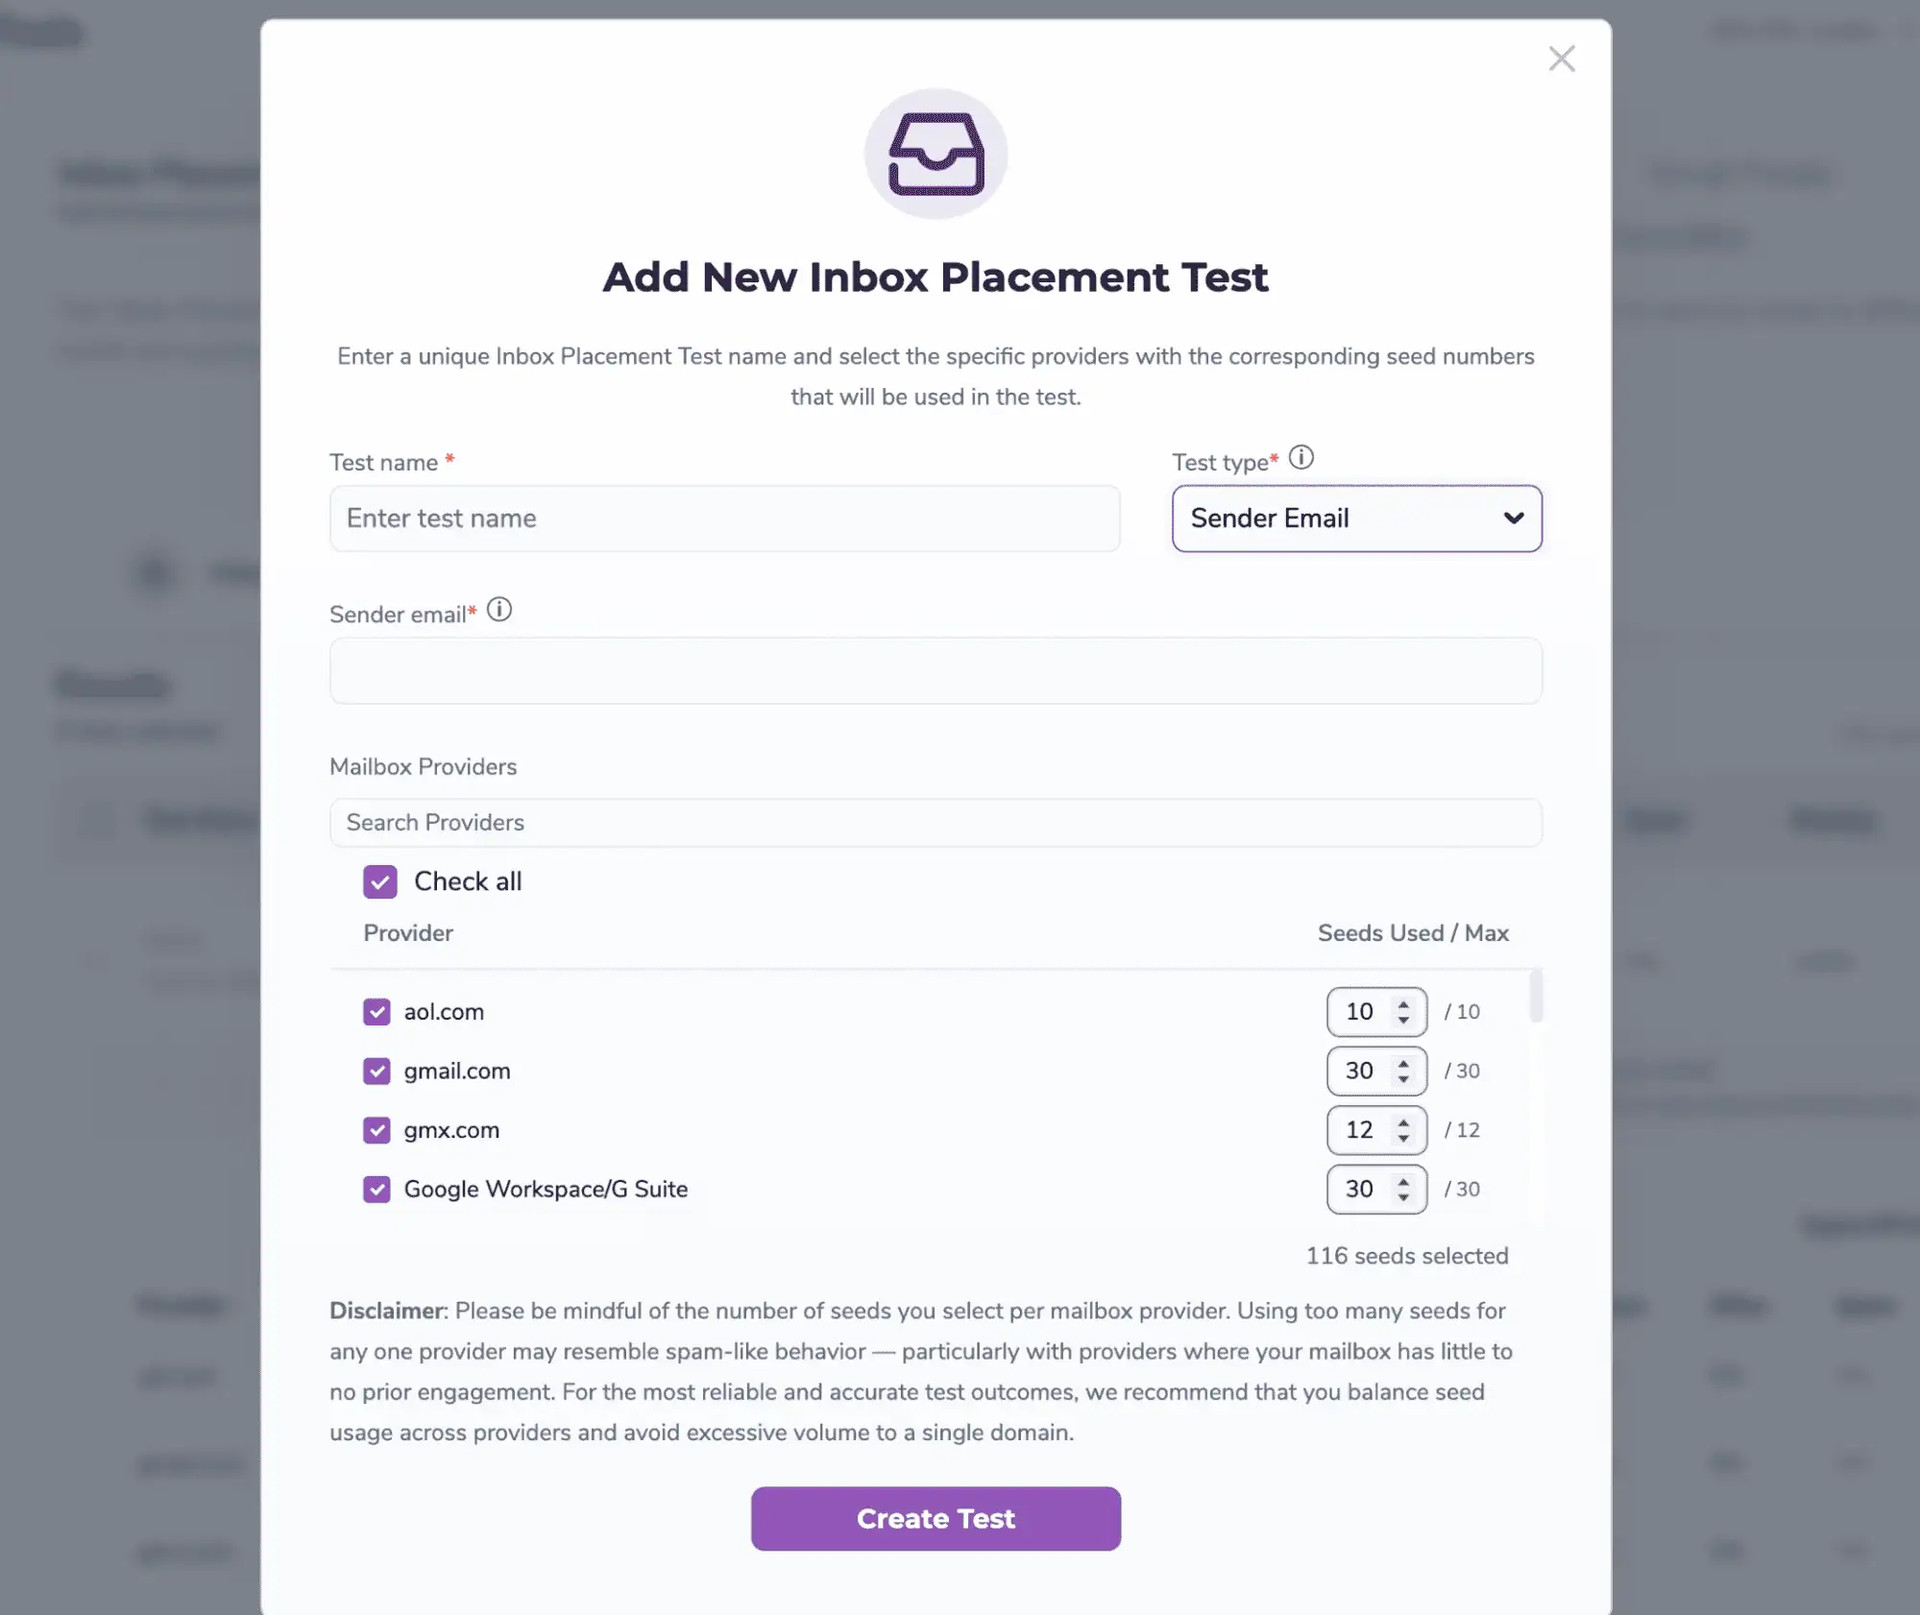
Please be mindful of the number of seeds you select per mailbox provider. Using too many seeds for any one provider may resemble spam-like behavior — particularly with providers where your mailbox has little to no prior engagement. For the most reliable and accurate test outcomes, we recommend that you balance seed usage across providers and avoid excessive volume to a single domain.
3. Fill the Sender email field with the exact From address that will send the test (e.g., newsletters@brand.com).
4. Copy the newly generated email addresses and add them to a new mailing list, or create a new campaign using your email service provider.
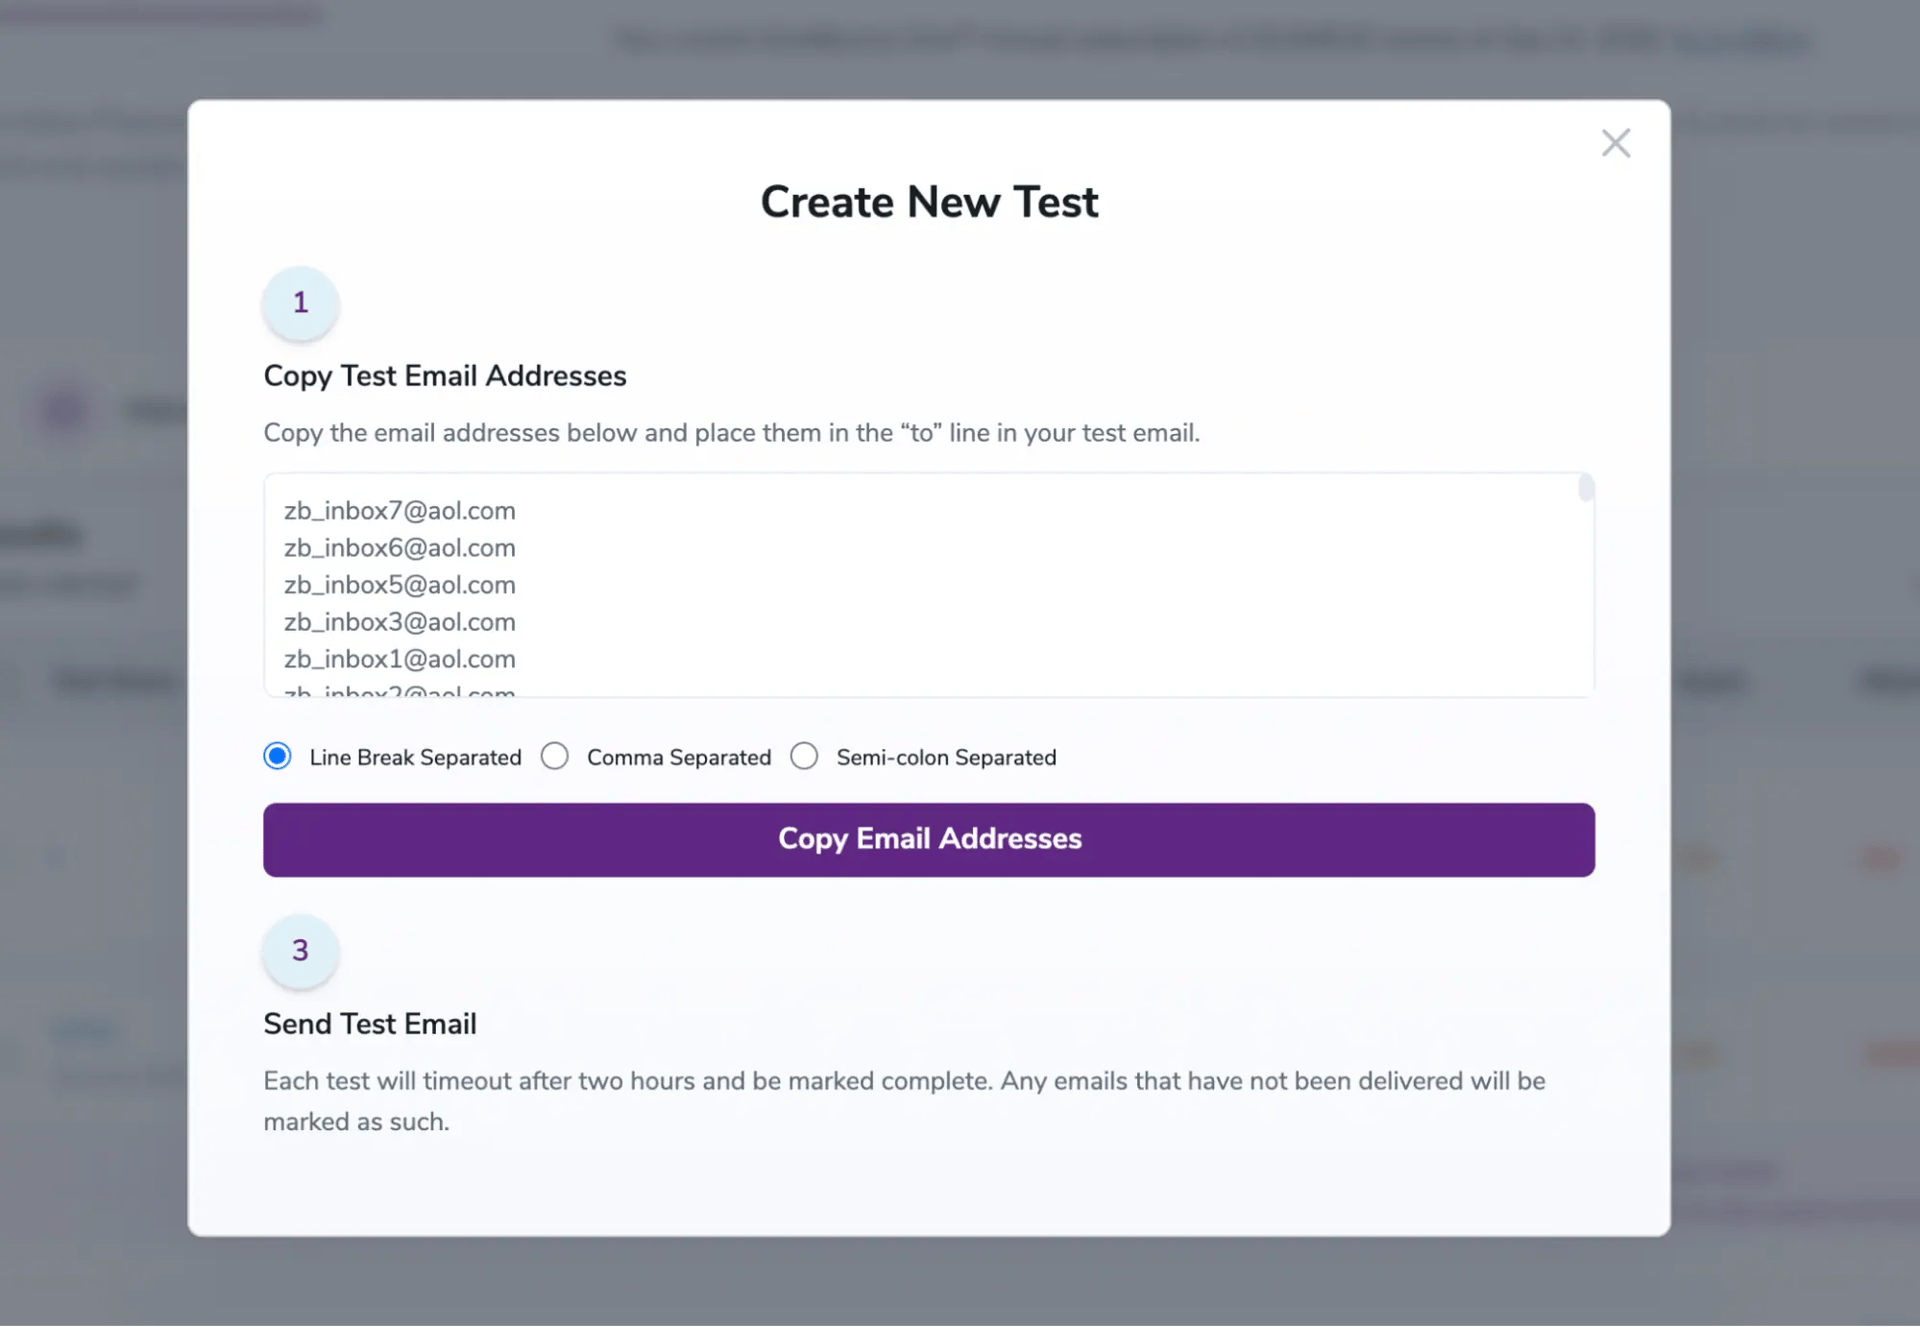
5. Send your email to the list of provided email addresses.
II. Unique ID
1. Click the ‘Create New Test’ button.
2. Enter a unique test name.
Select the test type - Unique ID
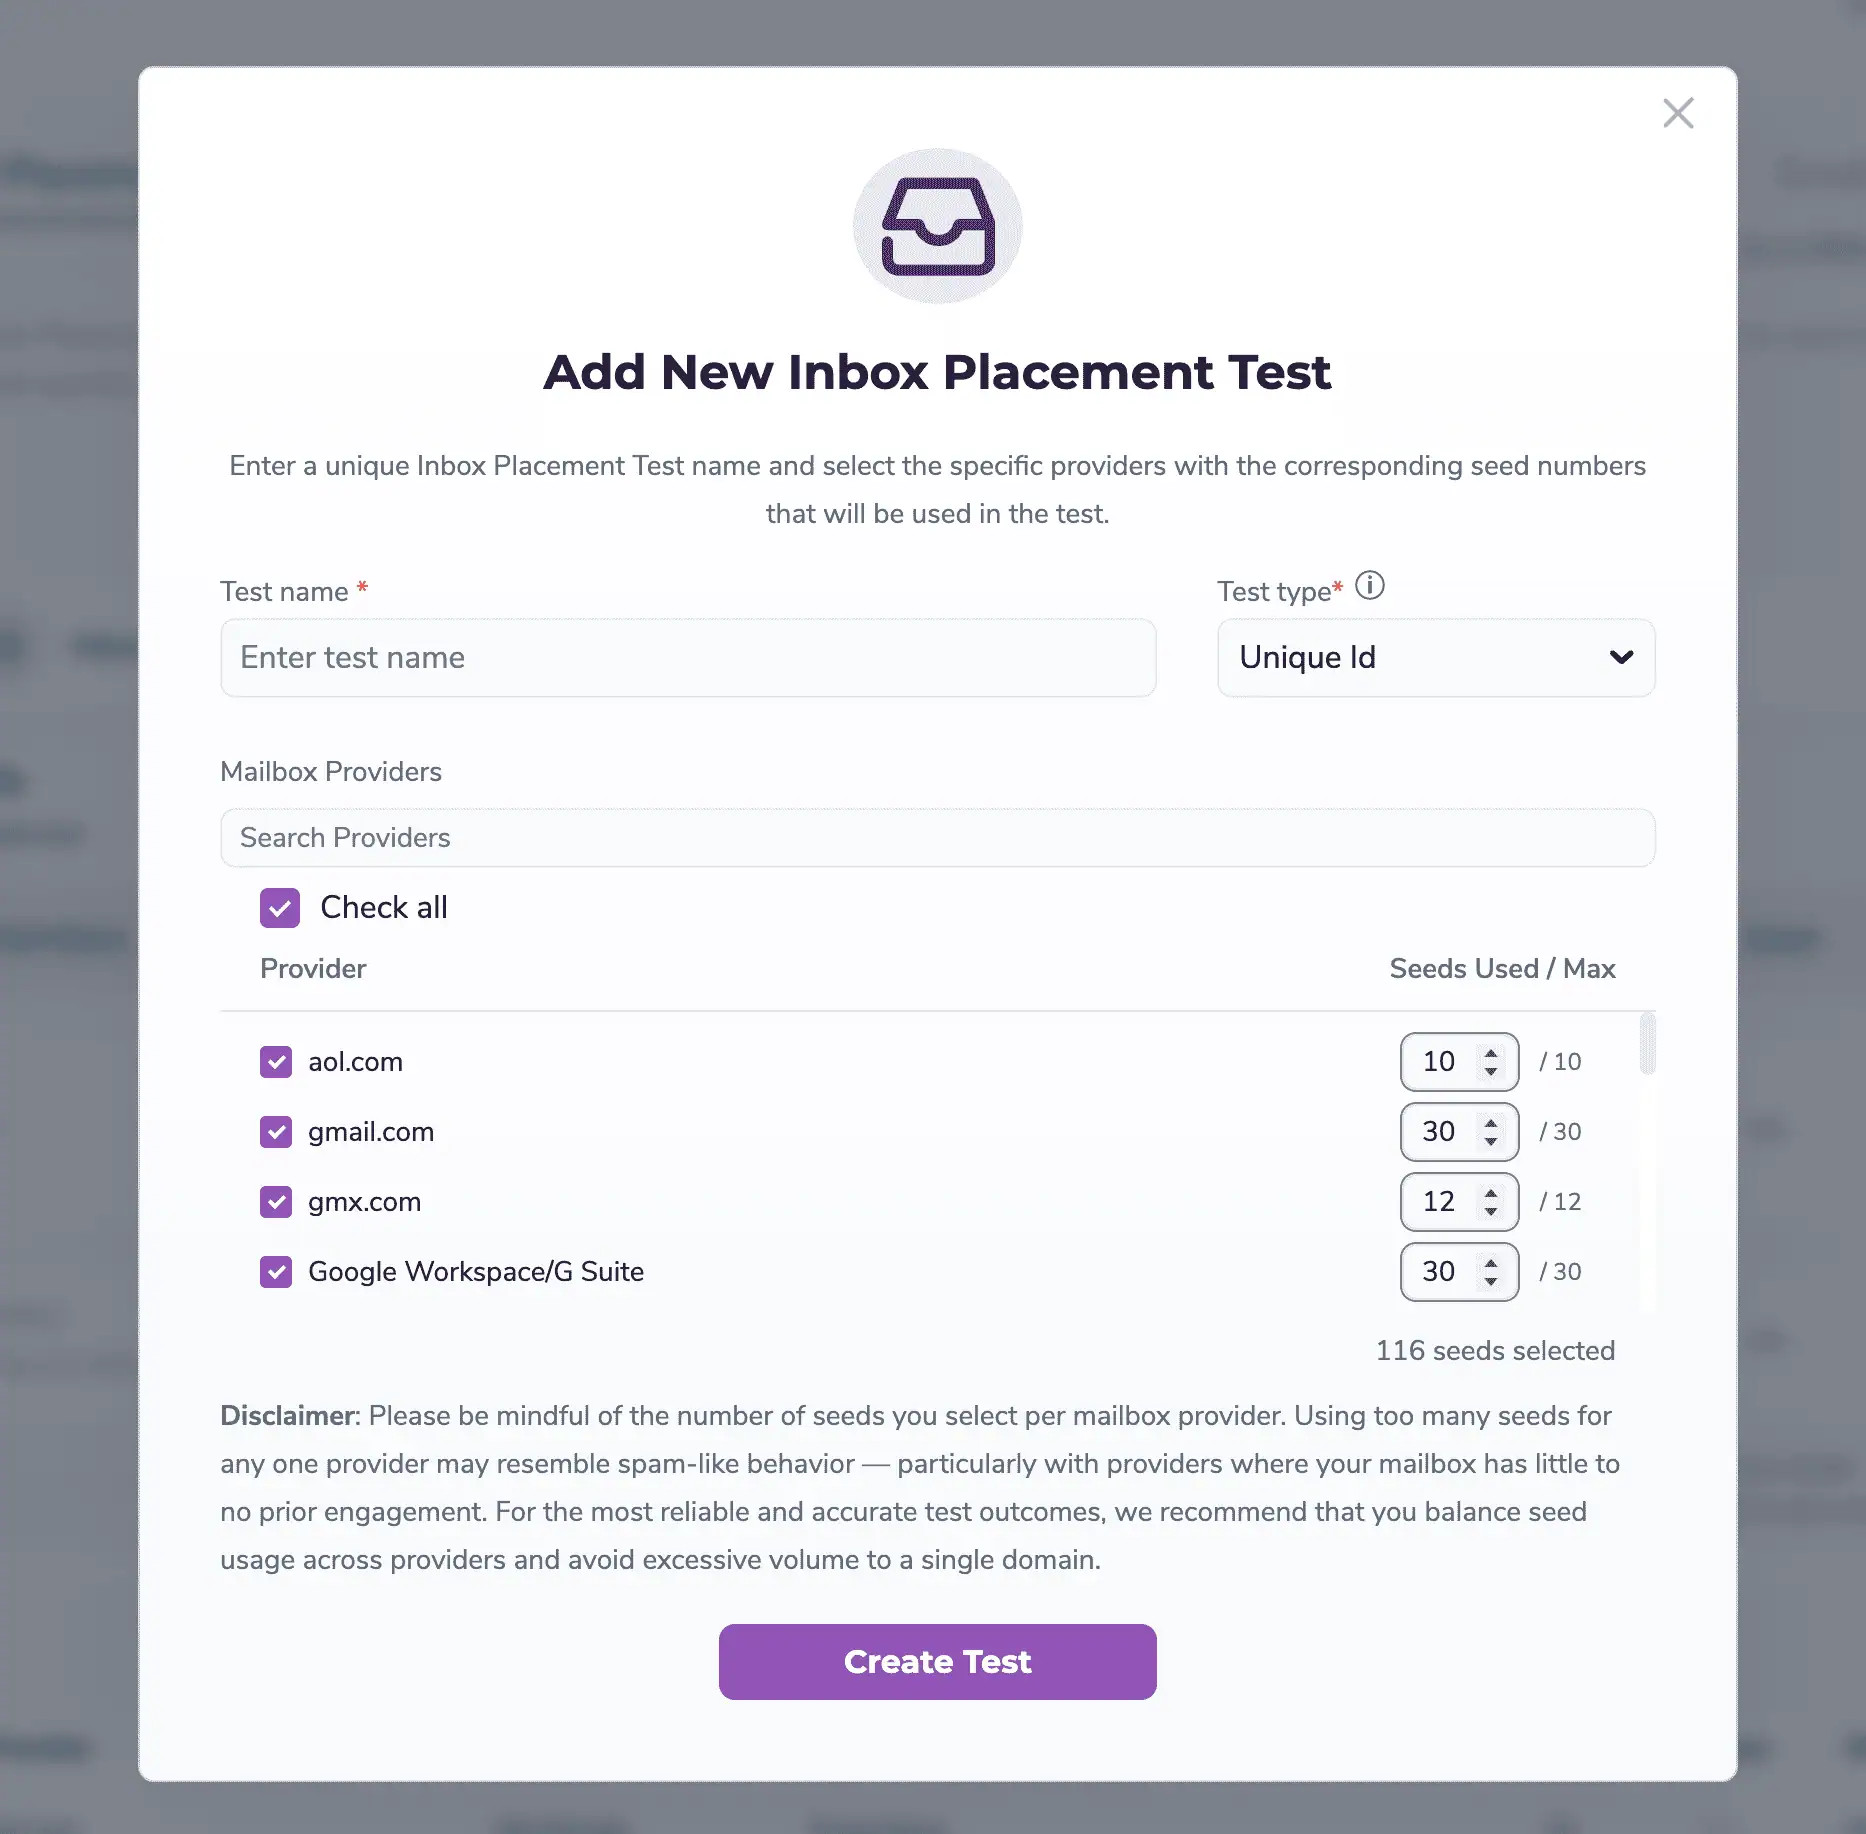
3. Copy the newly generated email addresses and add them to a new mailing list, or create a new campaign using your email service provider AND Copy the unique test code to your test email body.
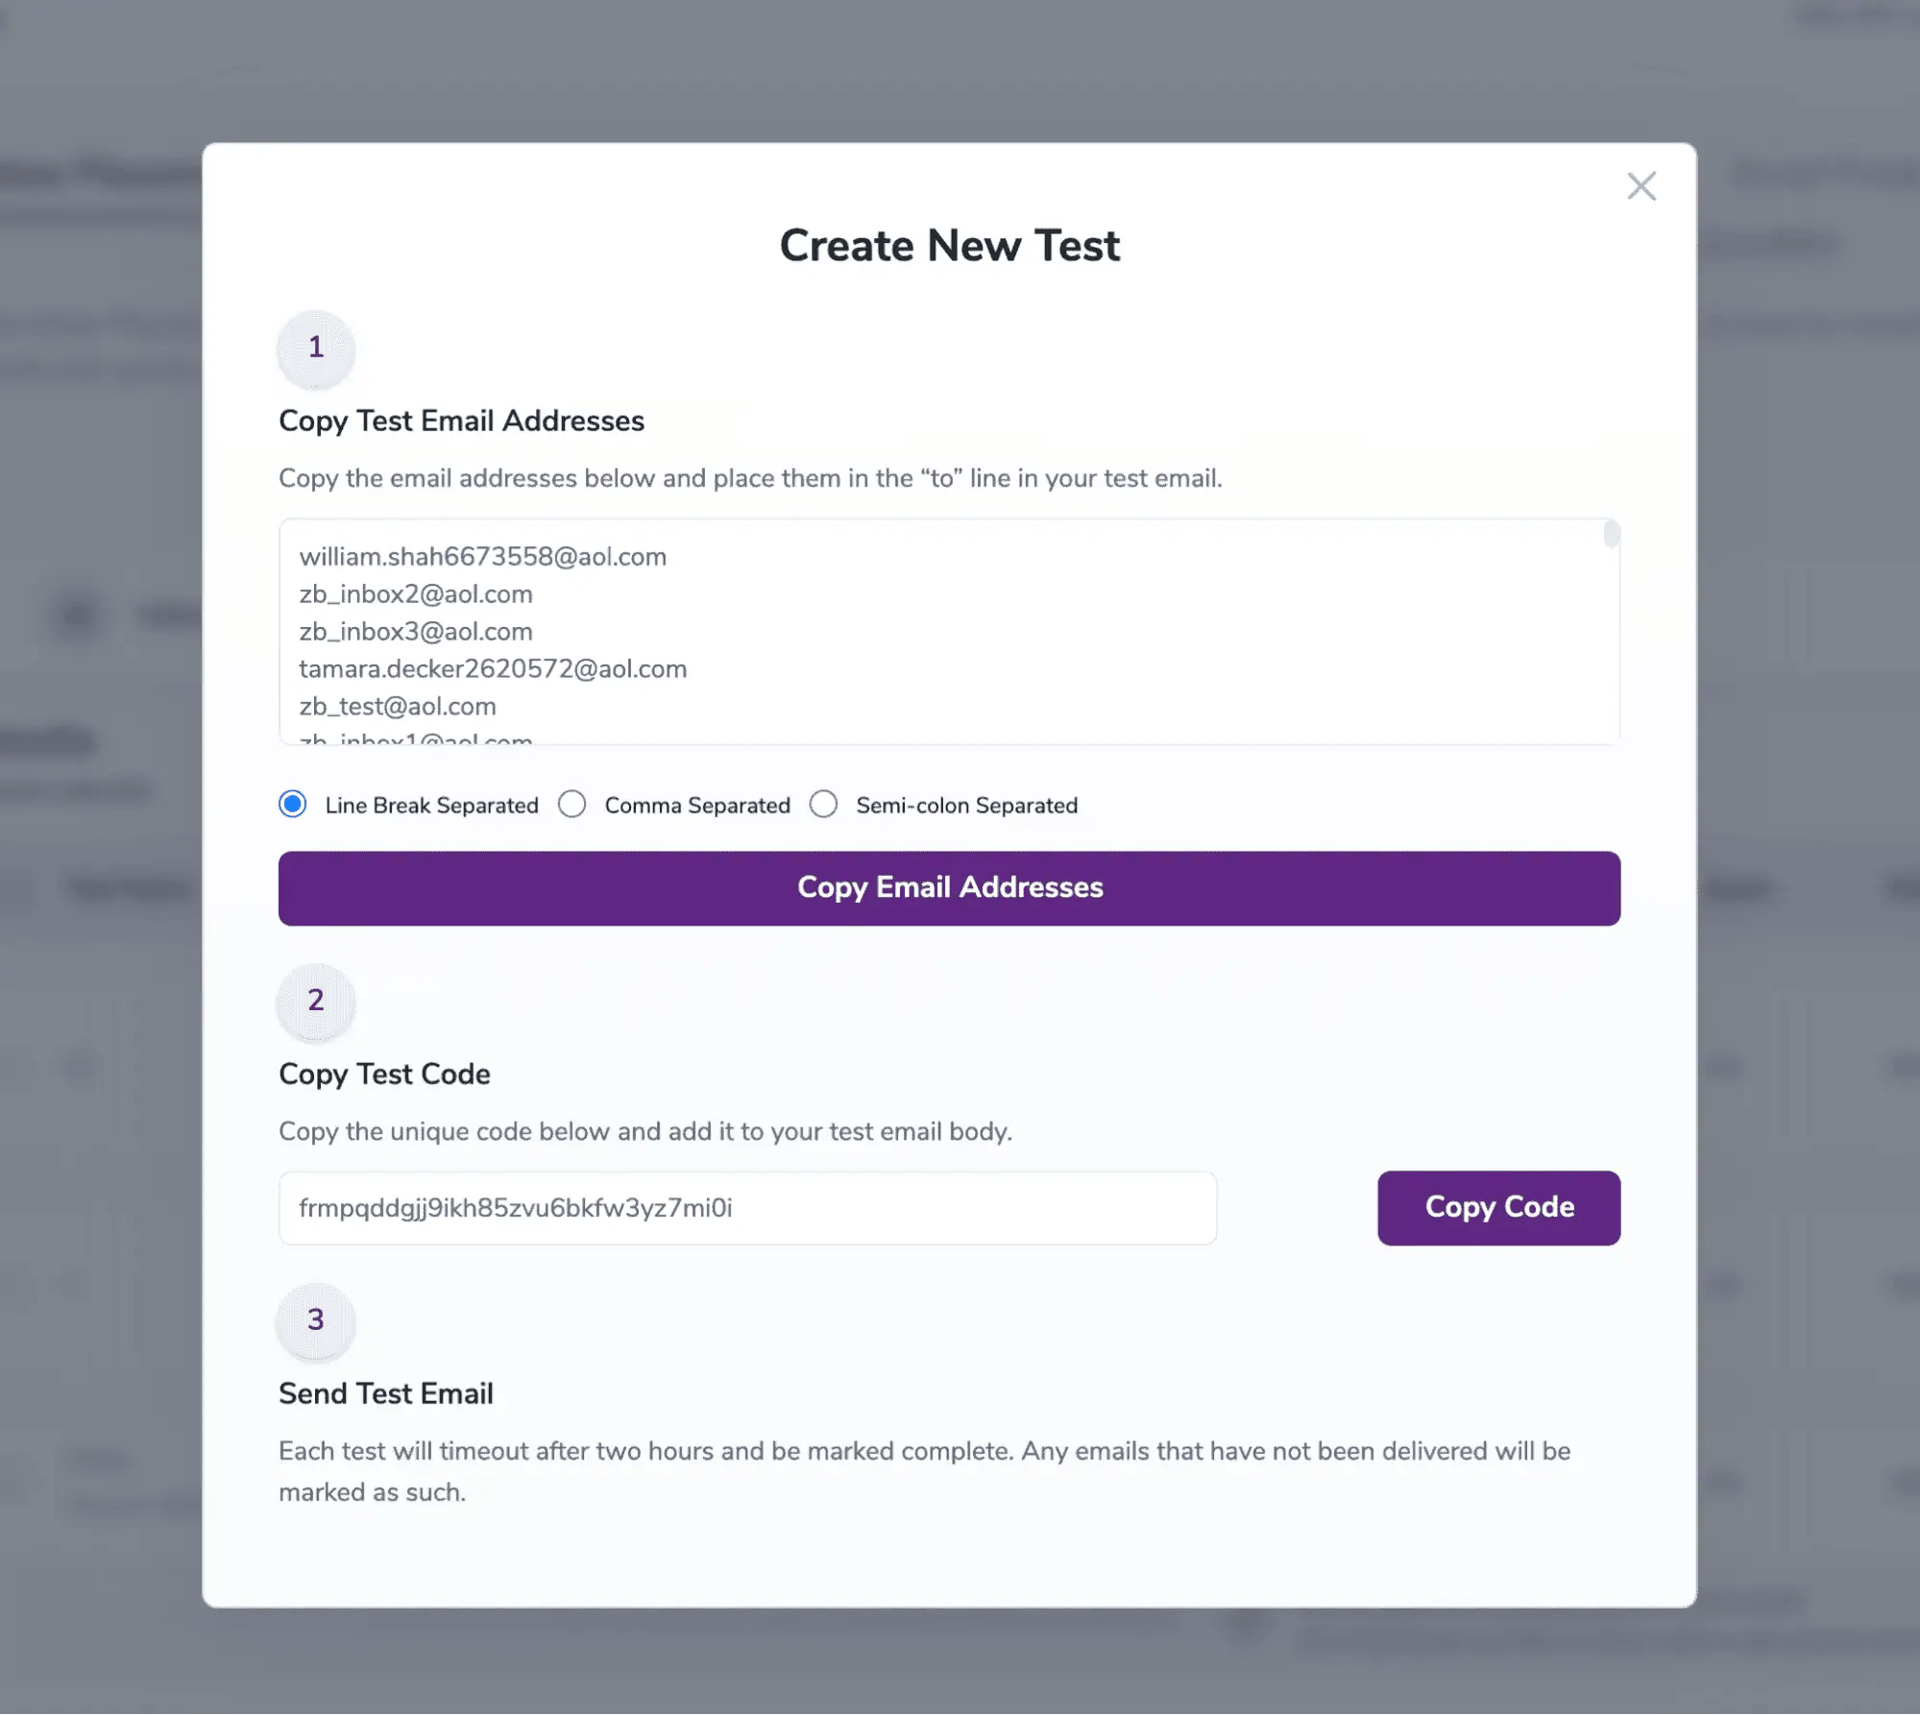
5. Send your email to the list of provided email addresses.
Please be mindful of the number of seeds you select per mailbox provider. Using too many seeds for any one provider may resemble spam-like behavior — particularly with providers where your mailbox has little to no prior engagement. For the most reliable and accurate test outcomes, we recommend that you balance seed usage across providers and avoid excessive volume to a single domain.
III. Auto Alias
1. Click the ‘Create New Test’ button.
2. Enter a unique test name.
Select the test type - Auto Alias
NOTE: If you are sending from Yahoo Mail, we recommend selecting the 'Sender email' or 'Unique Id' test type, since Yahoo does not support alias addresses.

Select the providers and their corresponding seed numbers for the test and click on Create Test
3. Copy the newly generated email addresses and add them to a new mailing list, or create a new campaign using your email service provider.
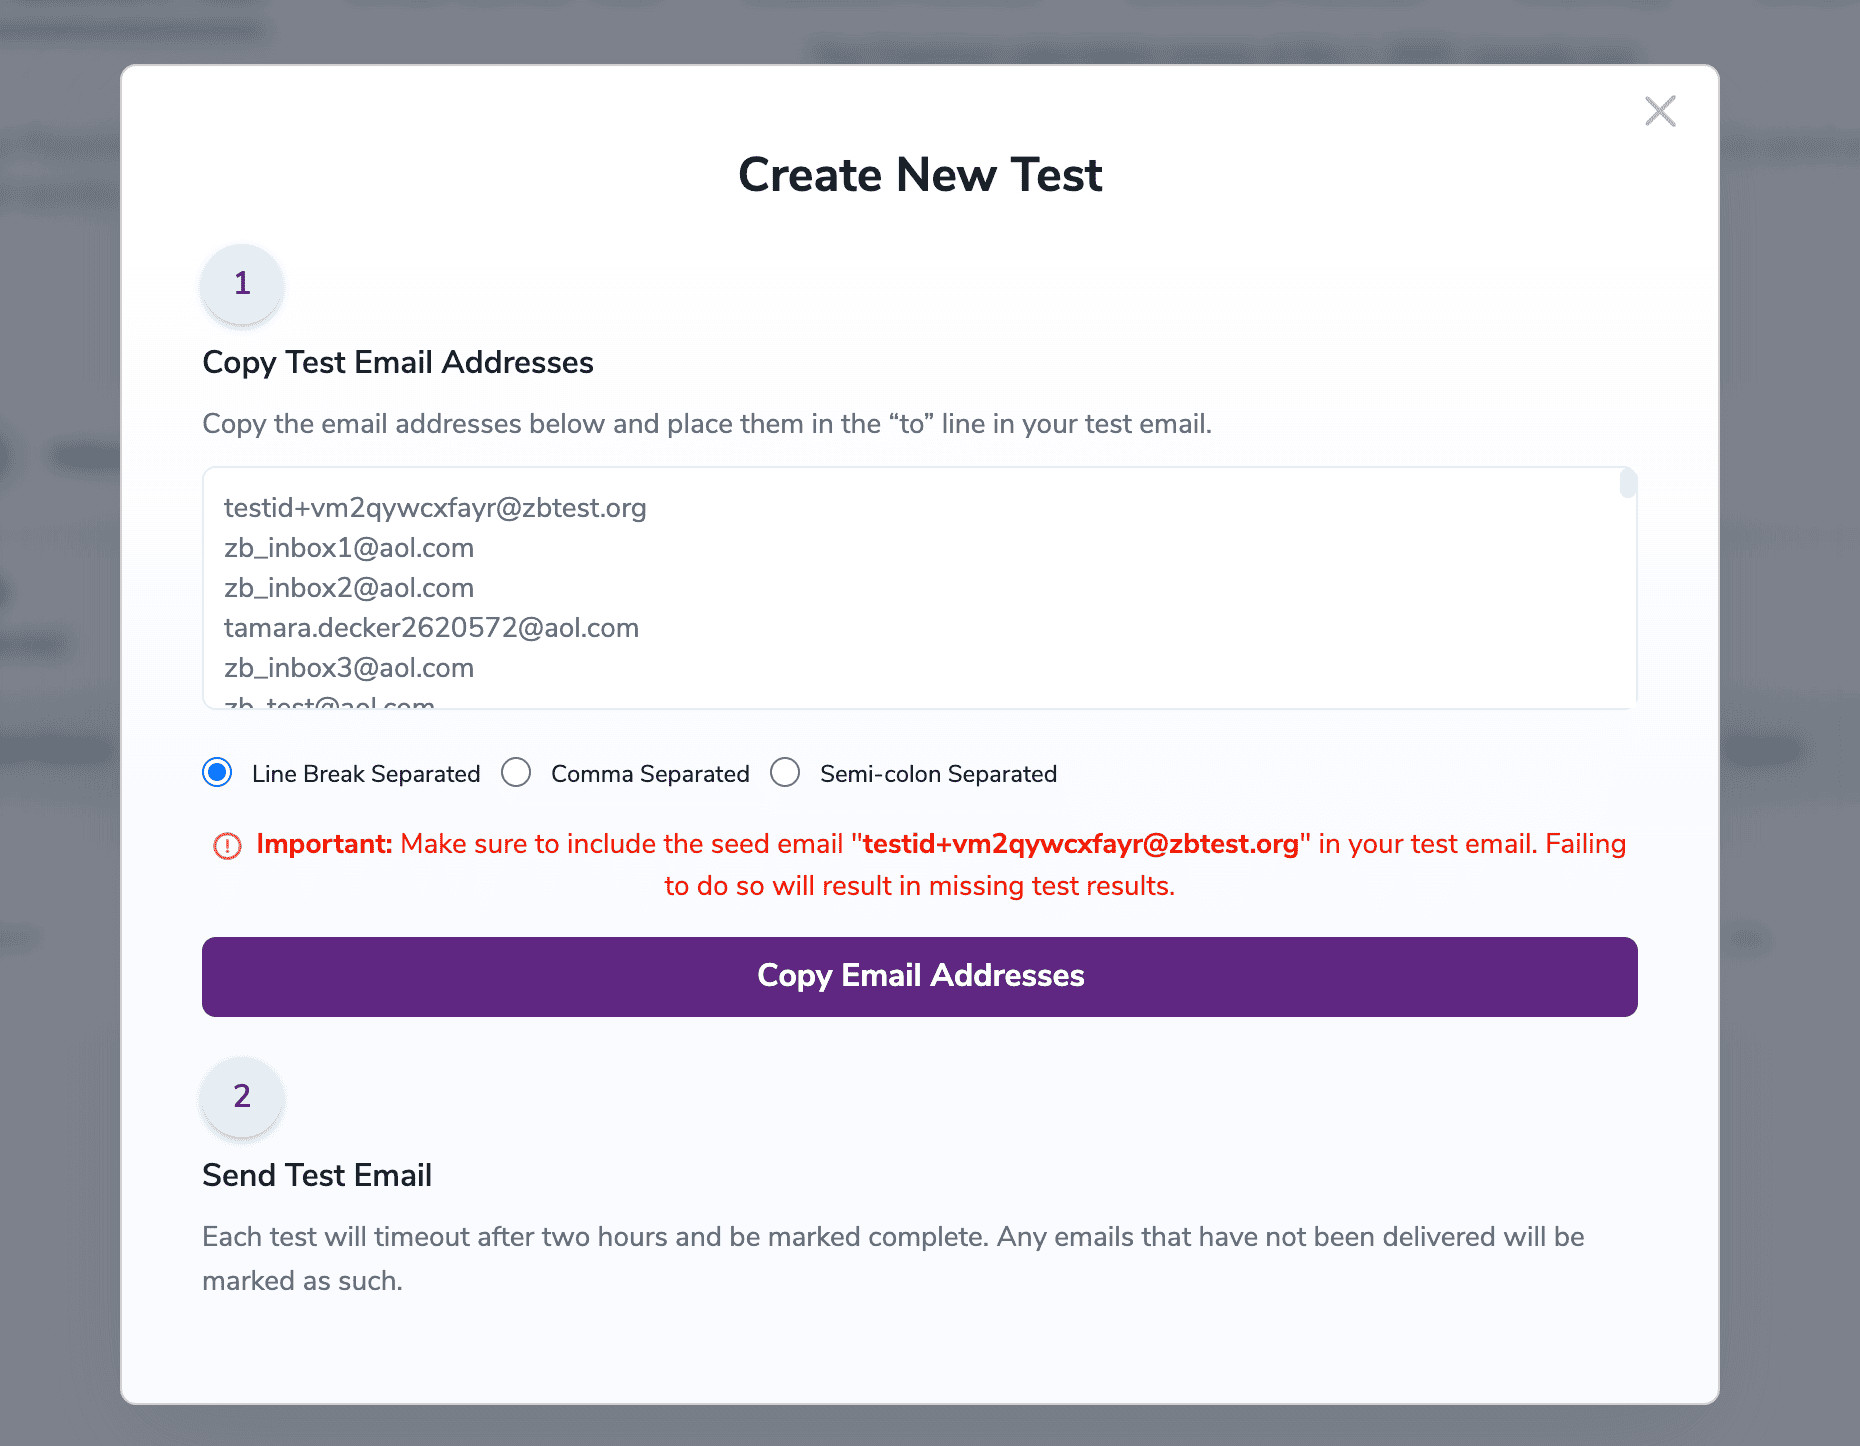
Important: Make sure to include the seed email "testid+vm2qywcxfayr@zbtest.org" in your test email. Failing to do so will result in missing test results.
4. Send your email to the list of provided email addresses.
Please be mindful of the number of seeds you select per mailbox provider. Using too many seeds for any one provider may resemble spam-like behavior — particularly with providers where your mailbox has little to no prior engagement. For the most reliable and accurate test outcomes, we recommend that you balance seed usage across providers and avoid excessive volume to a single domain.
Once the test email has been sent, our recipient inboxes begin the status reporting of your email message.
Secure Email Gateways
In addition to standard mailbox providers, the Inbox Placement Tester includes Secure Email Gateways.
What are Gateway Providers?
Gateway providers are enterprise-level email security systems used by businesses to filter incoming mail before it reaches the inbox.
What Do Gateway Seeds Do?
When selected, gateway seeds:
- Route your email through enterprise security filters
- Check authentication, reputation, and content
- Show whether the message passes, is quarantined, or blocked
These seeds are especially useful for B2B senders or anyone targeting corporate domains.
Inbox Placement Testⓘ results and descriptions
- ResultDescription
- InboxYour email successfully reached the recipient’s inbox.
- OtherAny email that is uncategorized
- SPAMWhen emails are marked spam, it's usually a result of the content or lack of content being sent, your IP hasn't been warmed up, or a mis-configuration of your mail server (Use our Email Server Testerⓘ to diagnose).
- MissingWhen emails are missing it's usually a result of a mis-configuration of your mail server (Use our Email Server Testerⓘ to diagnose), a virus was detected, or your IP/Domain Name is being blacklisted.
- DeliveredThe email was accepted by the gateway provider (e.g., Mimecast) and allowed to pass through to the recipient’s mail server. It cleared gateway-level security checks but may still be filtered by the mailbox provider
- QuarantinedThe email was accepted by the gateway but held in quarantine due to security or spam policy triggers, such as suspicious content, impersonation detection, or reputation concerns. It will not reach the mailbox unless released.
- Blocked/RejectedThe email was refused by the gateway during the SMTP connection and was not accepted. This is typically caused by authentication failures (SPF, DKIM, DMARC), poor IP/domain reputation, malware detection, or explicit block policies
Note:
To ensure accurate results when running an Inbox Placement Testⓘ, we strongly recommend using realistic and verifiable email content. The message sent to our seed list should closely resemble your actual campaigns in terms of layout, tone, subject line, and overall structure. Avoid using placeholder text or test content, as this can trigger spam filters and skew the placement data.
Email Server Tester
The Email Server Testing Platform analyzes your email headers, according to best practices set by mailbox providers, to ensure that your mail server is setup and configured correctly This tool offers an incredibly detailed look into your mail server settings. Here, you’ll be able to diagnose any deliverability issues, and forward the results to your company’s postmaster. Follow the steps below to begin testing:
You’ll be presented with a randomly assigned email address. The address pictured is for illustrative purposes. Send an email to the address from the mail server that you want to test:

Once you send the email, please allow a few minutes for your results to appear. Below the test email, you’ll see the following table.

Example email address to sent to: Note: if you click on ‘generate new test email’, it will make the old address un-usable. If you have any email campaigns that send to the old address, you will need to update them.
This is where your file status will be displayed. For your convenience, we’ve added an auto-refresh feature. Typically, results will be available in a matter of minutes. However, longer wait times are possible.
![Expand results arrow which allows you to see the details of ,[object Object], tool tests](/cdn-cgi/image/fit=scale-down,format=auto,quality=90,width=1080,metadata=none/docs/assets_next_docs/docs/deliverability-tools/email-server-test/server-test-3.webp)
View table of test reports
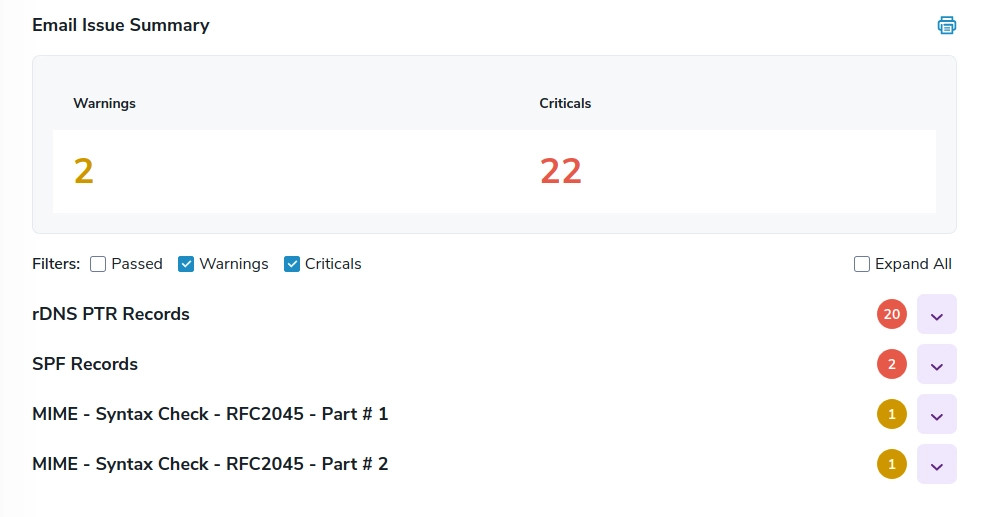
Once your results are available, the table will update and display the number of warnings and/or critical settings that your mail server settings have triggered. Next, click on ‘View Results’ to examine your report further.

Results Filters: Your results will be displayed on the following screen. If you're interested in filtering your results, simply select the appropriate checkbox at the top of the page, to update.
Once you’re presented with your results, you’ll have the ability to drill deeper into the data and identify potential issues in your mail server configuration that are keeping your emails from reaching their intended recipients. On the right side of the expanded results there is a blue printer button that allows you to save your results as a PDF. You can then forward the results to your postmaster.
Results screen
Blacklist Monitoring
As part of our Deliverability Tools, our Blacklist Monitoring service will allow you to verify your status with over 200 different blacklists. And if your domain or IP is flagged, you’ll know which blacklisting company to contact about being delisted. You’ll be able to enter not only your domain (example.com), but also your IPv4 (123.123.123.123) and IPv6 (2001:db8::8a2e:370:7334) addresses. We recommend monitoring all your IP addresses that you use to send mail and domain names you send mail from, as this will provide greater monitoring success. All subscription levels, including Freemium, will have access to the Blacklist Monitoring service.
If you’re unsure of what your domain or mail server IP address is? Use Google’s free DNS tool here.
To set up a monitor navigate to the Blacklist Monitoring page in the member’s dashboard. When you’re ready to create a monitor begin by clicking on 'Add New Monitor'.
![Add New Button for adding a new ,[object Object]](/cdn-cgi/image/fit=scale-down,format=auto,quality=90,width=1920,metadata=none/docs/assets_next_docs/docs/deliverability-tools/blacklist-monitoring/blacklist-monitor-1.webp)
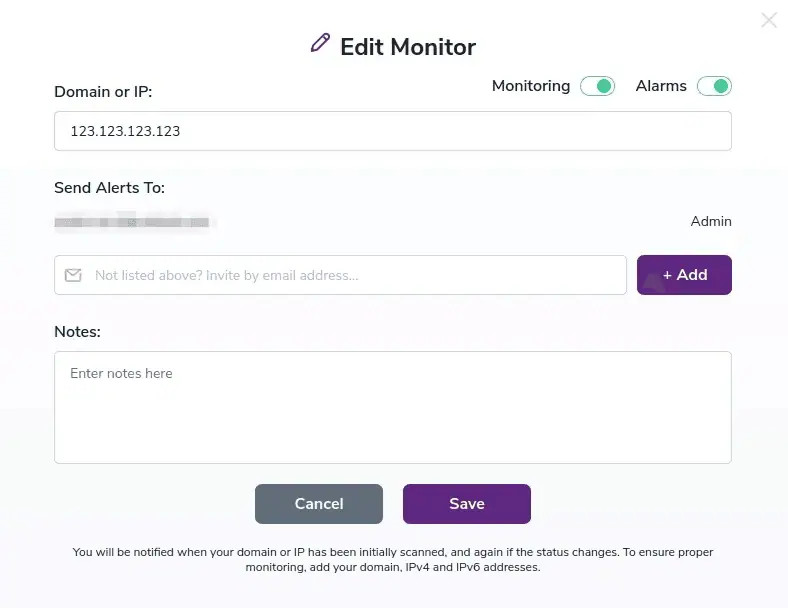
When setting up a monitor, you can also add a team member to send alerts to. This allows you to route your alerts to the proper team-member within your organization, or even outside vendors. If you haven’t done so when adding the monitor, you can also add it later using the Edit feature.
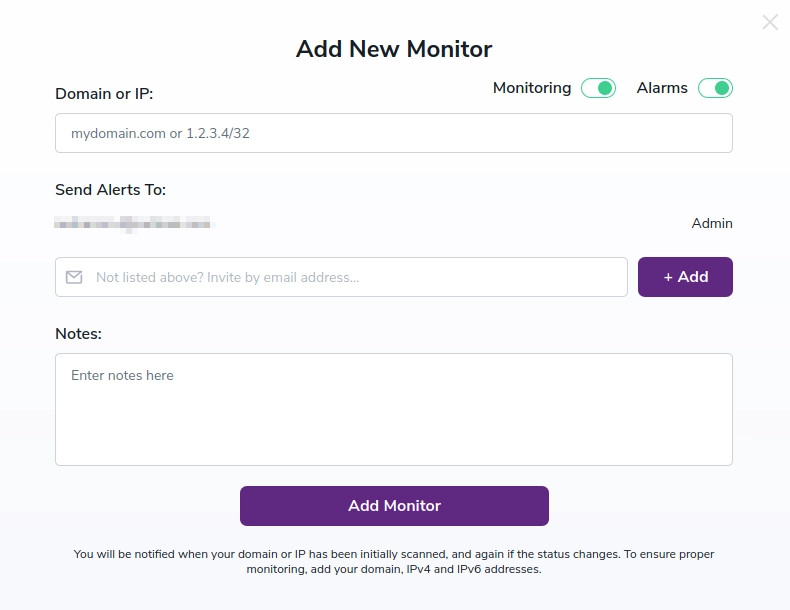
Add New Monitor window where set input the domain or IP and contact list for the monitor
Here you can proceed to enter the domain or IP address you wish to monitor. Then select which contact list should receive the alerts. If you haven’t created a contact list, you’ll be able to do so here. Finally, enter any notes you deem necessary.
When you’ve entered the proper information, click ‘Insert’ and your blacklist monitorⓘ is set up.
Depending on the level of your Deliverability Tools subscription, you’ll have a set number of monitors available to you. Also, your subscription level determines the frequency of which we check the domain or IP you’ve provided. Please see the table for a breakdown;
URL Parameters
- SubscriptionBlacklist MonitorsMonitor Frequency Check
- Freemium124 hrs.
- ZeroBounce ONE™108 hrs.
Custom plans also available.
If you’re unsure of how many monitors your account currently has available, that number is displayed just above the monitoring grid.
![An active ,[object Object]](/cdn-cgi/image/fit=scale-down,format=auto,quality=90,width=1920,metadata=none/docs/assets_next_docs/docs/deliverability-tools/blacklist-monitoring/blacklist-monitor-3.webp)
An active Blacklist Monitorⓘ
If you’d like to make changes to your monitoring settings, click the edit icon of the monitor you’d like to update. Once you do, you’ll be presented with a settings box. Here you can enable/disable the monitor status and alerts, as well as adding or removing notes.
If you’d like to toggle which blacklists are monitored, simply click on the arrow next to the domain or IP.
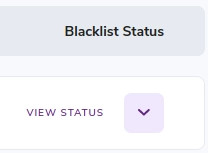
Arrow for Expanding Stats showing all the blacklists that have been scanned
![A ,[object Object], with its stats expanded showing the detailed report](/cdn-cgi/image/fit=scale-down,format=auto,quality=90,width=1920,metadata=none/docs/assets_next_docs/docs/deliverability-tools/blacklist-monitoring/blacklist-monitor-6.webp)
Note: The number of blacklists we monitor changes, so be sure to include not only your domain but also your IPv4 and IPv6 addresses.
You’ll now be able to toggle which blacklists you’d like us to monitor, by default all are set initially to ON.
Our alert system will notify you when your domain or IP has been initially scanned, then, only if the status of your domain or IP address has changed, i.e. it was added to a blacklist or delisted from one. The number of backlists we check against will fluctuate. To ensure proper monitoring, please make sure to monitor your domain, IPv4 and IPv6 addresses.
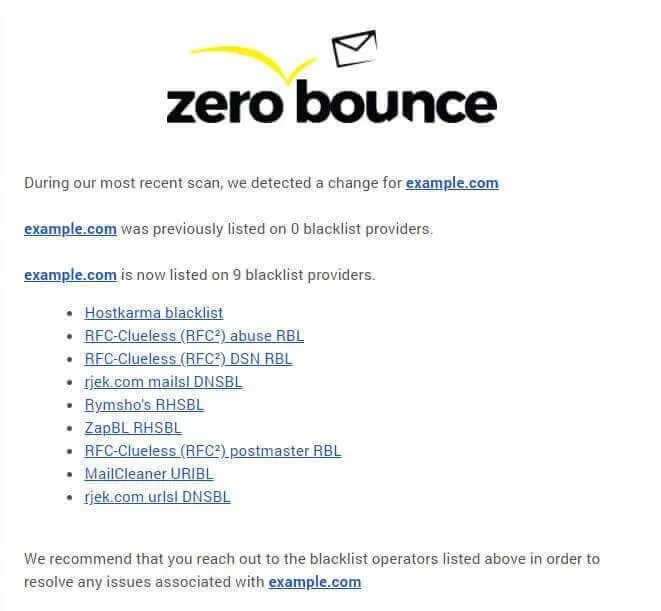
Sample email our alert system will send
If you have any questions, or need assistance in setting up or modifying either your subscription level or blacklist monitor, please contact us.
DMARC monitor Documentation
1. Introduction
Our DMARC monitorⓘ tool is designed to help you effectively monitor and analyze DMARC(Domain-based Message Authentication, Reporting, and Conformance) data for your domains. This documentation will cover detailed information and guidance on how to set up and how to use this tool to improve email security and authentication.
2. DMARC Basics
- What is DMARC?
DMARC, which stands for “Domain-based Message Authentication, Reporting, and Conformance” is a security protocol used to prevent email spoofing and phishing. In simple terms, DMARC helps ensure that the emails you receive in your inbox are actually from the sender they claim to be from. - How DMARC works?
It works by enhancing email authentication and providing a framework for email receivers to verify the authenticity of incoming emails. - DMARC Policies and Tags
Here’s an example of a DMARC Record generated by our DMARC monitor tool, let’s learn more about the tags and what can be customized:
v=DMARC1; p=none; sp=none;
rua=mailto:dmarc_aggregate_analyser+0d9f56ee5e6d38d98e937f227617bfe4@zerobounce.net!5k;
ruf=mailto:dmarc_forensics_analyser+0d9f56ee5e6d38d98e937f227617bfe4@zerobounce.net!5k;
rf=afrf; pct=100;ri=86400; fo=1;
v=DMARC1: This part of the DMARC record indicates the version of the DMARC protocol being used.
P: The “p” tag defines the policy for how failing DMARC checks should be handled.
rua: Specifies the email address where aggregate DMARC reports ( RUA ) should be sent. These reports provide information about overall email authentication results for the domain.
Sp: Stands for Subdomain Policy; Can be added to specify the policy for handling email sent from subdomains of the domain in question.
Ruf: Specifies the URI(uniform resource identifier) where forensic DMARC reports (RUF) should be sent.
RF: Report Format, we use afrf
3. What are the benefits of using our DMARC Analyzer/Monitor Tool?
3.a Dmarc Record Configuration
- Simplifies the process of setting up and configuring DMARC records for your domains
- Provides a user-friendly interface to customize DMARC policies, alignment requirements and other options
3.b Reporting and Monitoring:
- Aggregates and processes DMARC reports received from email providers and generates actionable insights
- Presents DMARC data in a comprehensible dashboard and format
3.c Aggregate Reporting:
- Generates aggregate DMARC reports to summarize email authenticationⓘ results for a domain
- Helps domain owners understand the overall health of their email authenticationⓘ
3.d Forensic Reporting:
- Provides forensic-level DMARC reports for individual email messages that failed authentication
3.e Customization and Policies:
- Supports customization of DMARC policies to instruct email receivers on how to handle unauthenticated or failed emails(none, quarantine, reject)
3.f Historical Data and Trend Analysis:
- Maintains historical DMARC data, enabling trend analysis and performance monitoring over time
3.g User-Friendly Interface
- Provides a user-friendly and intuitive dashboard for users to view and analyze DMARC data
- Includes charts and visualizations for easy data interpretation
4. DMARC monitorⓘ - How to create the DMARC Record
Creating and customizing our DMARC Record for the Monitor/Analyzer tool is quite simple:
1. Head over to Tools -> DMARC monitor
2. Click on Add Domain
![[object Object], Page](/cdn-cgi/image/fit=scale-down,format=auto,quality=90,width=1920,metadata=none/docs/assets_next_docs/docs/deliverability-tools/dmarc-monitor/dmarc-monitor-1.webp)
3. Add the domain you want to Monitor
![Add a ,[object Object], Domain](/cdn-cgi/image/fit=scale-down,format=auto,quality=90,width=1920,metadata=none/docs/assets_next_docs/docs/deliverability-tools/dmarc-monitor/dmarc-monitor-2.webp)
4. Once we add the domain we’ll get our DMARC Record; this is where we can customize it by clicking on the Optional Settings button

5. Done customizing? Add the DMARC TXT record into your DNS registrar and proceed by clicking on the Verify DMARC record button
6. It may take up to 24 hours for your DMARC policy to take effect. We’ll send an email once we’ve verified it’s working correctly.
7. Your domain’s status will be “Verifying DMARC record…” until the DNS record propagates and the DMARC monitorⓘ gets synced.

Note: The DMARC monitorⓘ tool is live only after the Verifying DMARC record status is gone, any emails sent before or meanwhile it’s setting up will not be monitored by the tool. It does NOT monitor emails retrospectively, only from the time the tool is fully configured.
5. Pricing and Packages
- Included in all ZeroBounce ONE™ memberships ($99/month, $79/month annual)
- Can also be purchased via Custom plans
- Costs $49 for 1 DMARC monitor up to 50 then it’s discounted by 25% and even 50% for a higher volume(purchased via Custom Packages)
Note: 1 DMARC monitorⓘ credit will be used only as long as the domain is being monitored/analyzed and is not deleted, after deletion the DMARC monitorⓘ Domain credit will be freed up and can be reused with another domain.
6. DMARC monitorⓘ dashboard, functionality and features
In our DMARC monitorⓘ dashboard we will find the following:
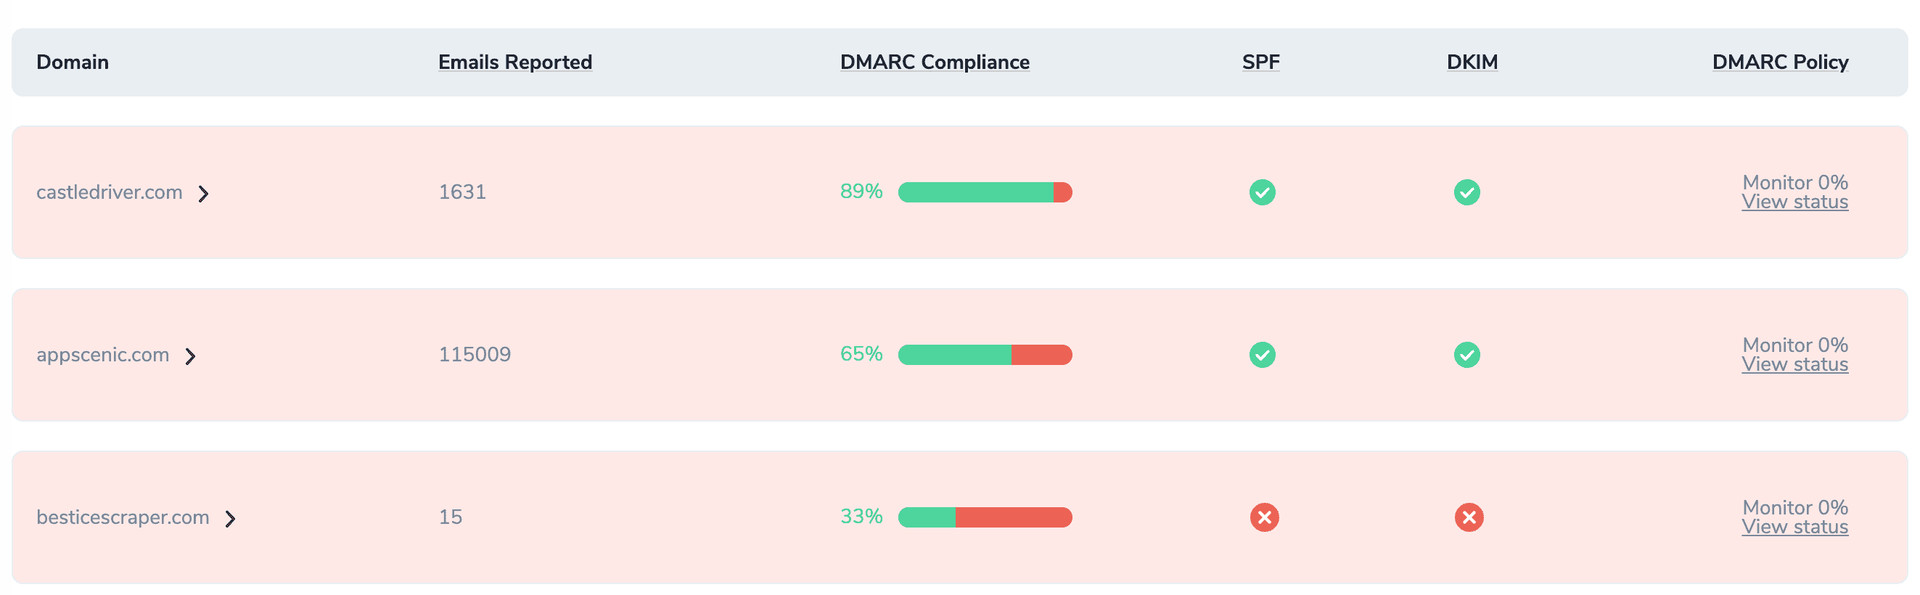
![[object Object], Dashboard](/cdn-cgi/image/fit=scale-down,format=auto,quality=90,width=1920,metadata=none/docs/assets_next_docs/docs/deliverability-tools/dmarc-monitor/dmarc-monitor-5.webp)
Domain = the domain monitored
Emails Reported = The number of emails reported for this domain
DMARC Compliance = The percentage of emails that successfully align with both SPF and DKIM
SPF = The SPF Alignment
DKIM = The DKIM Alignment
DMARC Policy = The DMARC Policy applied for the domain
To find out more about the DMARC reports/emails reported we’ll have to click on our domain which will forward us to the next dashboard, as seen in the screenshot below:
![[object Object], Statistics](/cdn-cgi/image/fit=scale-down,format=auto,quality=90,width=1920,metadata=none/docs/assets_next_docs/docs/deliverability-tools/dmarc-monitor/dmarc-monitor-6.webp)
We can select the start and end date for which we want the statistics, we’ll get a count of the total emails reported and a count of the Monitored, Quarantined or Rejected emails(depending on our dmarc policy) and also a percentage of the DMARC complianceⓘ.
Scrolling down a bit further we’ll find our “Sources”
![[object Object], Sources](/cdn-cgi/image/fit=scale-down,format=auto,quality=90,width=1920,metadata=none/docs/assets_next_docs/docs/deliverability-tools/dmarc-monitor/dmarc-monitor-7.webp)
Sources = Email servers/recipient servers that have sent us dmarc reports.
Clicking on a specific domain, as in our case google.com will open a dashboard containing information only received by that particular domain.
![[object Object], Country Statistics](/cdn-cgi/image/fit=scale-down,format=auto,quality=90,width=1920,metadata=none/docs/assets_next_docs/docs/deliverability-tools/dmarc-monitor/dmarc-monitor-8.webp)
IP’s in the screenshots are redacted for security reasons, the actual dashboard will shot the full IP(s).
Requests by country = This is determined by geolocating the sender IP’s used to send the emails for which we received the report(s). The Source IP field specifies the exact IP’s used to send the emails while also providing a count for the Emails Reported, a DMARC Compliance percentage, and our SPF and DKIM success rate.
To get even more information we can click on any of the Source IP’s and we will find:
![[object Object], Domain Details](/cdn-cgi/image/fit=scale-down,format=auto,quality=90,width=1920,metadata=none/docs/assets_next_docs/docs/deliverability-tools/dmarc-monitor/dmarc-monitor-9.webp)
Reporter: The domain that generated and sent the DMARC report to our RUA
Policy Overrides: A DMARC policy override occurs when an email recipient decides to override the policy that you have specified in your DMARC record. Additional information about Policy Overrides can be found here
From Domain: The domain used by the sender of the email( sender domain )
Return-Path Domain: Specifies the domain of the return-path. The return-path is an email header that tells SMTP servers where they should send non-delivery notifications(a.k.a bounces).
Policy applied: Monitored = a policy of none or no action was taken(emails that passed SPF and DKIM alignment)
Note: If the domain has a red-ish highlight as in the screenshot below, it means that the domain is NO longer set up for DMARC monitoring. Possible causes: the DMARC record generated by the tool was modified and the record wasn’t updated in your DNS registrar.