What Payment Methods Does ZeroBounce Accept?
ZeroBounce uses PayPal and Stripe as their primary payment processor. Therefore, you can use all payment methods that either platform accepts. Payments through Link are also now available.
What credit cards can I use with ZeroBounce via PayPal?
PayPal currently accepts the following payment methods:
- Visa
- Mastercard
- American Express
- Discover
- JCB
- Diners Club
- EnRoute
- Level 2 and 3 Purchasing Cards (P-Cards)
Learn more about PayPal payment methods via their Acceptance page. You can also view which countries are supported by PayPal payments to determine if you or your business is in a valid location.
What payment methods can I use with Stripe?
ZeroBounce now supports expanded payment options through Stripe, including some popular platforms used internationally. These payment platforms include:
- Apple Pay
- Google Pay
- Cash App
- Afterpay/Clearpay
- Klarna
- Bancontact
- EPS
- Giropay
- iDEAL
- Sofort
- WeChat Pay
- Alipay
In addition to this, ZeroBounce supports 135 international currencies for Pay-As-You-Go purchases. When attempting checkout with a Pay-As-You-Go order, the currency will be determined based on your location.
You can find the full list of Stripe’s supported currencies on their website.
Any payment via PayPal or Stripe may be used for your ZeroBounce purchases.
Does ZeroBounce accept bank wire or ACH?
You can pay for your credit or subscription via bank wire or Automated Clearing House. Please contact support@zerobounce.net for more information.
How to pay with PayPal
To pay for your ZeroBounce purchase with PayPal, follow these steps:
- When adding credits or subscriptions to your cart, click the 'PayPal' button.
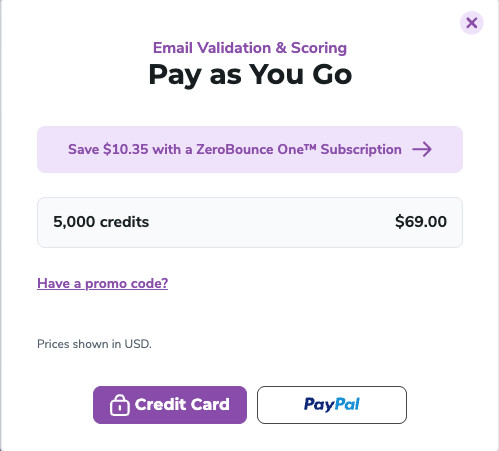
- Sign in to your PayPal account.
- Select your preferred payment method and click Complete Purchase.
How to pay with Link
You can now use Link for a simple, one-click checkout.
To do so, follow these steps:
- Add your credits or subscription to your cart, and head to checkout.
- At the top of the page, click 'Pay with Link'.
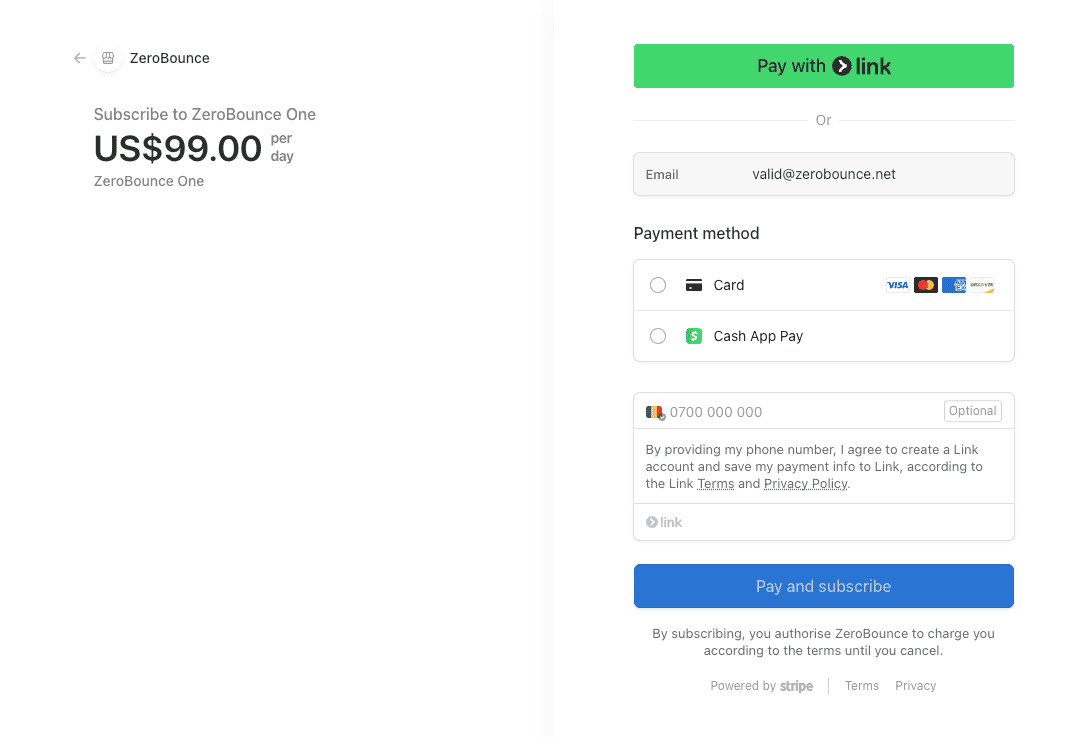
- Sign in to your Link account.
- Click Pay.
You can also securely save your Link information for future purchases by checking the box at the bottom.
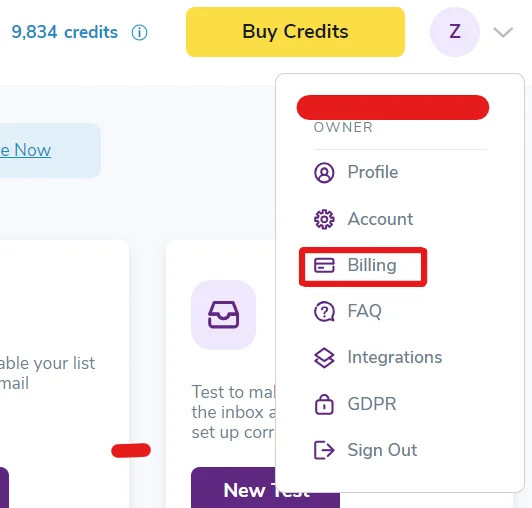
How to change your preferred payment method
To change your payment method on file with ZeroBounce, proceed with the following steps:
- From your ZeroBounce dashboard, hover over your account icon in the upper right corner. Then, click Billing.
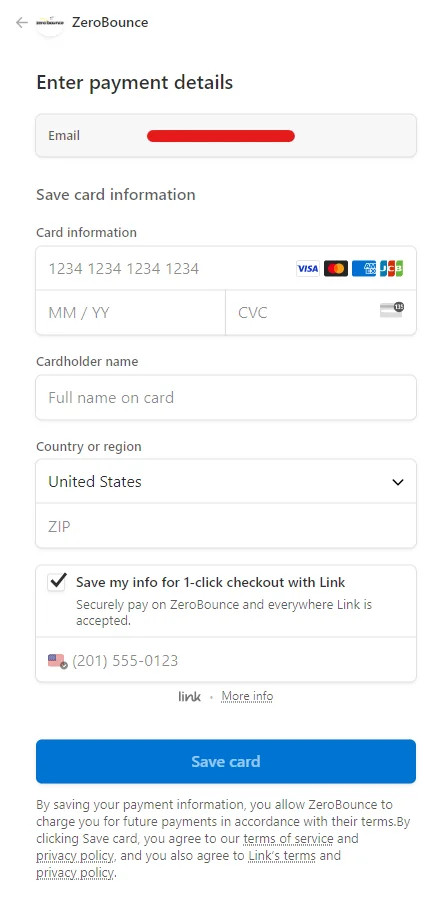
- You’ll be sent to the ‘Payment Method’ tab within the Billing menu. Click the dropdown to reveal your current payment method details. Then, click Replace Card.

- Enter the details for your new payment method. After you’ve finished entering your data, click Save Card.
If you prefer to use the Link checkout method, check the box next to 'Save my info for 1-click checkout with Link.'
- Back in the Billing settings page, you’ll now see your new payment method on file. If you ever wish to remove any payment methods entirely, simply click Remove Card.
How to set up Autopay
You can use any of the above payment methods to automatically add new credits to your account when your balance runs low.
To set up Autopay, follow these steps:
- From your dashboard, go to Settings.
- Under Billing, click on Plans & Autopay.
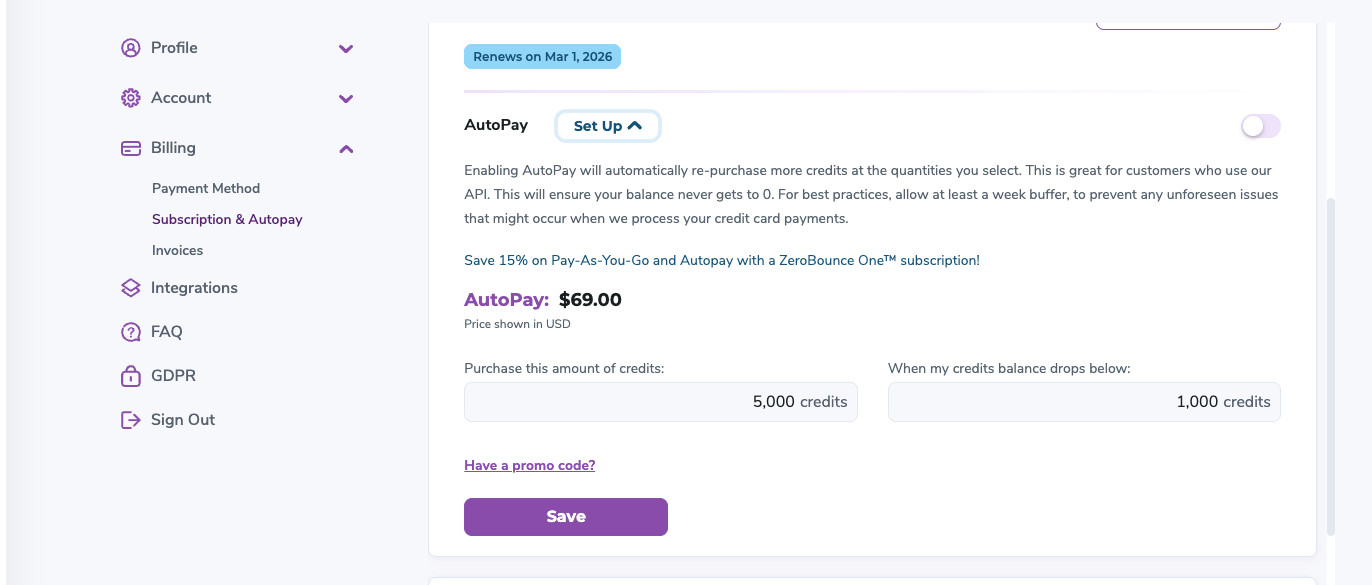
- In the first field, enter the amount of credits you want to purchase with Autopay.
- In the second field, select the credit threshold you want to use for future Autopay purchases. When your balance drops below your designated amount, we will automatically bill your preferred payment method and add new credits to your account.
- Click Save.
Related Articles
How do I check out as a guest with PayPal?
What does my bank decline code mean?
How is pricing determined for email verification?